Showing posts with label side dish. Show all posts

Tuesday, September 18, 2012

Edamame Pasta Salad with Goat Cheese and Honey Dressing


Pasta salads are one of my favorite summer foods. For me, pasta is a comfort food but, when the weather is hot, I don’t always want to eat a heavy and hot meal so I turn to pasta salads. My “go to” pasta salad is mayo based with celery, egg, peas, and tuna. My mom and grandmother both always have a big bowl of it in the refrigerator throughout the summer. It keeps well, everyone in my family loves it, and it goes perfectly with grilled meats and vegetables. However, you know I like to switch things up. I’m also very finicky when it comes to mayo. Sometimes, especially when it’s hot out, it makes my stomach feel a little weird. So I generally try to stick with more oil-based pasta salads when I’m experimenting.

This recipe uses lemon juice, olive oil, and honey. I think the flavor combination is absolutely wonderful. The lemon keeps it light, the olive oil keeps it from being dry, and the honey makes it just a little bit sweet. The goat cheese tones down the sweetness of the honey and the tartness of the lemon and it all comes together perfectly. When you let the pasta salad sit for a couple hours, the liquids cause the goat cheese to break down a little bit, which creates a creamy sauce that coats everything. For vegetables I used edamame and cucumber for some crunch and tomato for some color. I think next time I would substitute the tomato for a red bell pepper because it would hold up better. But you can use any veggies that you like!

This can also be eaten cold as a pasta salad or slightly warmed. If you stick it in the microwave for about 30 seconds, the pasta will get a little warm and the goat cheese will melt but the vegetables will still stay crisp! 

Edamame Pasta Salad with Tomatoes, Cucumber, and Honey Dressing adapted from Sugarcrafter
  • 8 ounces pasta (I used penne)
  • 6 ounces frozen edamame, shelled and thawed
  • 1/2 pint grape tomatoes
  • 1/2 cucumber, diced
  • 1/4 cup onion, diced
  • 1/2 cup goat cheese
For the dressing:
  • 1 1/2 Tbsp olive oil
  • 1 1/2 Tbsp honey
  • 1/4 tsp lemon juice
1.       Cook the pasta according to package directions. Let cool completely.
2.       Dice the cucumber and onion, and halve the tomatoes.
3.       In a large bowl, combine all of the ingredients.
4.       In a small bowl, stir together the olive oil, honey, and lemon juice. Toss with the salad. Can be served chilled or slightly warm. 


Sunday, September 2, 2012

Fiesta Lime Rice


I’m not a huge fan of just plain rice. It bores me. So when I was looking for a side dish to go with my Mexican-themed meal, I knew I wanted to have something a little more exciting than plain white or brown rice.  I found this recipe that I absolutely love. You can use less rice because the recipe is bulked up with corn and beans, so it cuts the carbs. And the boredom. As indicated in my blog name, I tend to be bored and hungry so I try to cook things that fix that :)

I don’t have a ton to say about this recipe but you should give it a try as a slightly different and more colorful, tasty, and nutritious alternative to plain rice. You won’t be disappointed!

Fiesta Lime Rice (4 1 cup servings – 153 cals) from Skinnytaste
  • 1 1/2 cups cooked long grain rice
  • 3/4 cup canned black beans, rinsed and heated
  • 3/4 cup cooked corn, heated
  • 1 large scallion, diced fine
  • 2-4 tbsp chopped cilantro
  • 1 tbsp fresh squeezed lime juice
  • salt to taste
1.       In a large bowl, combine hot rice, heated corn, heated beans, scallion, cilantro, lime juice and salt if needed. Toss and serve.

jazzed up fiesta lime rice!


Saturday, July 14, 2012

Roasted Garlic Parmesan Broccoli

Sounds simple, right?

Well, it is.

But it also has a pretty impressive presentation and a great taste. Since my grandmother's birthday, she has called me four times to tell me how great it was and ask me questions about how I prepared it.  Usually side dishes get overlooked or overshadowed by the main dish. The main dishes for her dinner were marinated steak tips (to DIE for, I swear they melt in your mouth) and baked shrimp scampi (recipe to coming soon!). So the fact that the broccoli made such an impression on people really says something.

As I mentioned in my last post, I'm currently obsessed with roasting vegetables. I grew up with steamed frozen vegetables. When I'm running low on time or energy, frozen veggies are still my go to side dish. But if I have any fresh vegetables and a little time before dinner, I just cannot resist roasting them. Is it just me or does roasting give everything a wonderful nutty flavor? I might be making that up but I love it.

The addition of parmesan cheese and breadcrumbs makes the roasted broccoli look a little fancier and taste richer. The preparation is just as easy as simply roasting the broccoli with olive oil but the additions make it seem more appropriate for a special occasion.

Try this for a semi-elegant twist on roasted broccoli!

Roasted Garlic Parmesan Broccoli (4 servings)
  • 1 lb fresh broccoli, broke up into large florets
  • 2 Tbsp olive oil
  • 2 cloves garlic, minced
  • 1/2 tsp pepper
  • 1/4 tsp salt
  • 1/3 cup seasoned bread crumbs
  • 1/4 cup parmesan
  • 2 Tbsp butter, cut into small pieces
  1. Preheat the oven to 400 degrees.
  2. Place the breadcrumbs in a 9x13 pan for 2 minutes. Transfer into a bowl and set aside. 
  3. Toss the broccoli with olive oil, garlic, salt, and pepper. Mix in breadcrumbs and parmesan cheese.
  4. Transfer to the 9x13 pan. Sprinkle pieces of butter evenly over the top of the broccoli. Roast for about 15 minutes or until the broccoli reaches the desired tenderness.


viola!

Wednesday, July 11, 2012

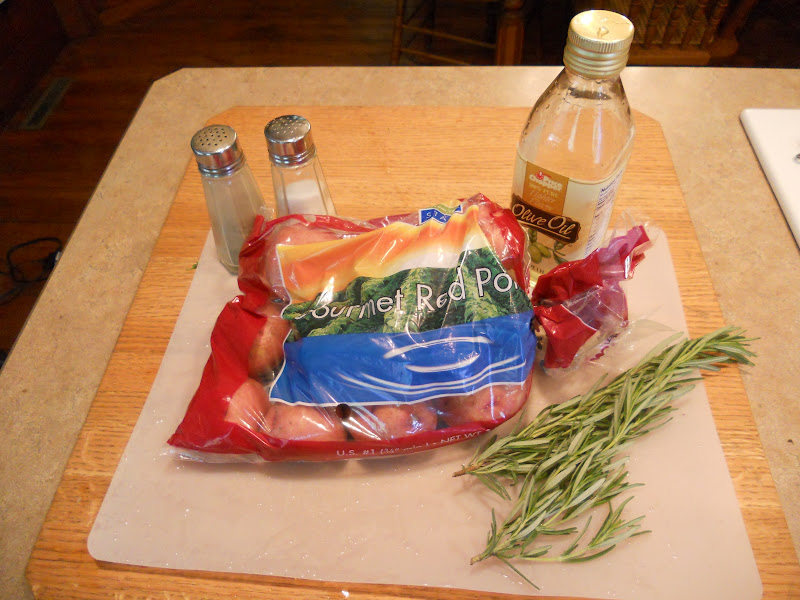
Roasted Rosemary Red Potoates

I love roasting vegetables for so many reasons. It's so easy. Basically you just have to chop your favorite veggies, toss them in olive oil and some seasoning, and put them in the oven at around 400-450 until they are cooked to your desired tenderness. Easy peasy!

I also love that it really brings out the natural flavors of the vegetables and the herbs that you choose to use. The vegetables aren't smothered in a rich sauce that overpowers them. Now don't get me wrong... I'm a HUGE fan of thick, creamy, cheesy sauces but we're trying to keep it light for summer, remember? Rosemary has a wonderful aroma. I got mine straight from my grandfather's garden, which makes it even better because it's completely fresh. And free :)

Roasted. Rosemary. Red potatoes. I love alliteration almost as much as I love roasting ridiculously remarkable raw red potatoes.

Ok, I'm done.

This recipe is so simple. The combination of fresh rosemary and potatoes is a classic combination for a side dish to accompany meat main dishes. The leftovers would be reheated in a skillet to make home fries and covered with drippy eggs.

I'll be sharing the other two dishes that I made with these potatoes for my grandmother's birthday later in the week so stay tuned!

Roasted Rosemary Red Potatoes (8 servings) 
  • 3 lbs red potatoes, cut into 1/2 inch pieces
  • 2 Tbsp olive oil
  • 2 Tbsp rosemary, minced
  • 1 tsp salt
  • 1 tsp pepper
  1. Preheat the oven to 400 degrees. Spray a 9x13 pan with cooking spray.
  2. Toss the red potatoes with the olive oil, rosemary, salt, and pepper. 
  3. Place the potatoes the prepared pan in a single layer to ensure even roasting. Roast for 30-40 minutes (I did around 40 because I had other items in the oven and we like our potatoes a little browned on the outside.)


Wednesday, June 20, 2012

Honey Glazed Snow Peas and Carrots

In the last post I said that I always get too distracted to make vegetable side dishes that require a recipe. I usually take the easy way out and just serve some frozen veggies with some seasonings and butter and call it a day. I know, I know... a total food blog flop.

But now I'm giving you two veggie side dish recipes in a row! Aren't you thrilled?!?! Actually, I'm sure you'd rather see some epic dessert. And, frankly, so would I. But it's bikini season so I'm throwing some veggies on here to motivate us all.

I love the honey glaze on this dish. It works perfectly with the sweet carrots and the delicate snow peas. This light sauce would be great to throw on any vegetables that you are serving to accompany a sweeter main dish like barbeque or teryaki flavored meats. I served this with the turnips that I just posted and the main dish that I'll post in a couple days! The tangy lemon and the sweet honey paired quite well together. And this bright side dish jazzed up the tasty but visually boring turnips. Success!

Simple. Easy. Light. Summery. Perfect.

Honey Glazed Snow Peas and Carrots (6 servings)
  • 2 cups baby carrots
  • 1/2 lb snow peas
  • 2 Tbsp butter
  • 2 Tbsp honey
  • 1tsp garlic powder (or fresh minced would be great!)
  1. Steam the carrots for 10-15 minutes (mine took a little on the longer side) or until tender. Add snow peas and continue steaming for 2 minutes. 
  2. Melt the butter in a pan. Add the vegetables. Stir in honey and garlic powder. 
  3. Cook over medium heat for 2 minutes.

on my grandmother's fancy dishes :)

Monday, June 18, 2012

Roasted Lemon Thyme Turnips

I am constantly looking to experiment with side dish recipes. However, I generally forget about the side dish because I am concentrating on the main dish (and the dessert of course!). I also make a lot of one dish meals. But enough with the excuses, I have an awesome and easy veggie side dish recipe for you guys!

In the winter, I crave soup, pasta, cream sauce, and anything else that will make me feel warm and full. In the summer, I love fresh, crisp vegetables that I can enjoy while sitting on a patio. When I went to my grandmother's house for dinner the other day, she had bought some turnips from the farmer's market. I had never eaten turnips before but I was up for the challenge of cooking them! My grandmother said that they are usually served mashed but, as I said before, I really like the feel of fresher vegetables in the summer so I decided to roasted them with onions and lemon juice.

I really liked the way they turned out! The texture reminded me of something between a carrot and a potato while the taste reminded me more of cauliflower. However you want to describe it, I dig it and plan on using them more often. The lemon and thyme gave the dish quite a strong tangy flavor. It went really well with the other side dish and main course I served (recipes will be coming later this week!). The only negative aspect of this dish is that it looks very boring with the white turnips and the white onions. When I made it again, I will at least garnish it with slices of lemon and larger sprigs of thyme. It might even be nice to throw in a nice green vegetable like asparagus, green beans, or Brussels sprouts!

If you're a turnip virgin like I was, give it up already and try these ;)

Roasted Lemon Thyme Turnips (6 servings)
  • 6 turnips, cut into 2'' cubes
  • 1/2 Vidalia onion, sliced
  • 2 Tbsp olive oil
  • 1/4 cup lemon juice
  • 2 Tbsp thyme
  1. Preheat the oven to 400 degrees. 
  2. Toss the turnips and onions with the olive oil, lemon juice, and thyme. Place in a baking dish. 
  3. Bake for about 30-40 minutes or until tender.


I went to use dried thyme but my grandfather had some fresh in his garden!

it tastes a lot more exciting than it looks!

Friday, December 16, 2011

Mashed Sweet Potato Brulee

So tomorrow is my last final for the semester. My normal course of action before a final is to get strung out on coffee, eat only gummy candy, neglect sleep and cram in all the information that I didn't learn all semester. It gets really ugly. However, I've been on my game so I barely need to study this semester! It's almost like I'm a responsible adult. Except I don't have money or a real job. But it's awesome because instead of being a shell of a person, I'll be spending my evening leisurely sipping decaf tea, writing about food, and watching Pixar's Up. Perfection.

Speaking of animated movies... I'm really disturbed by today's youth. Today I showed The Lion King to a senior Spanish class. It started at the part where Mufasa dies. I reacted like any normal human being would... by erupting into tears. I probably could have held it together if I had been prepared but I didn't realize that it'd start out like that. And I hadn't had my coffee so I was really emotional. The kids looked at me like I was insane. Granted, I'm a total movie and book crier (The Notebook and Stepmom are my biggest vices). Real life situations? Not so much. It's weird. But anyway, these kids must have hearts of stone. I don't think you should be allowed to own animals or reproduce or be a member of society if Mufasa's death doesn't make you AT LEAST a little misty-eyed. It's the only true test of character. And they didn't laugh at Timone and Pumba at all.  I swear, I teach demons.

Sorry, I just had to vent. Back to food...

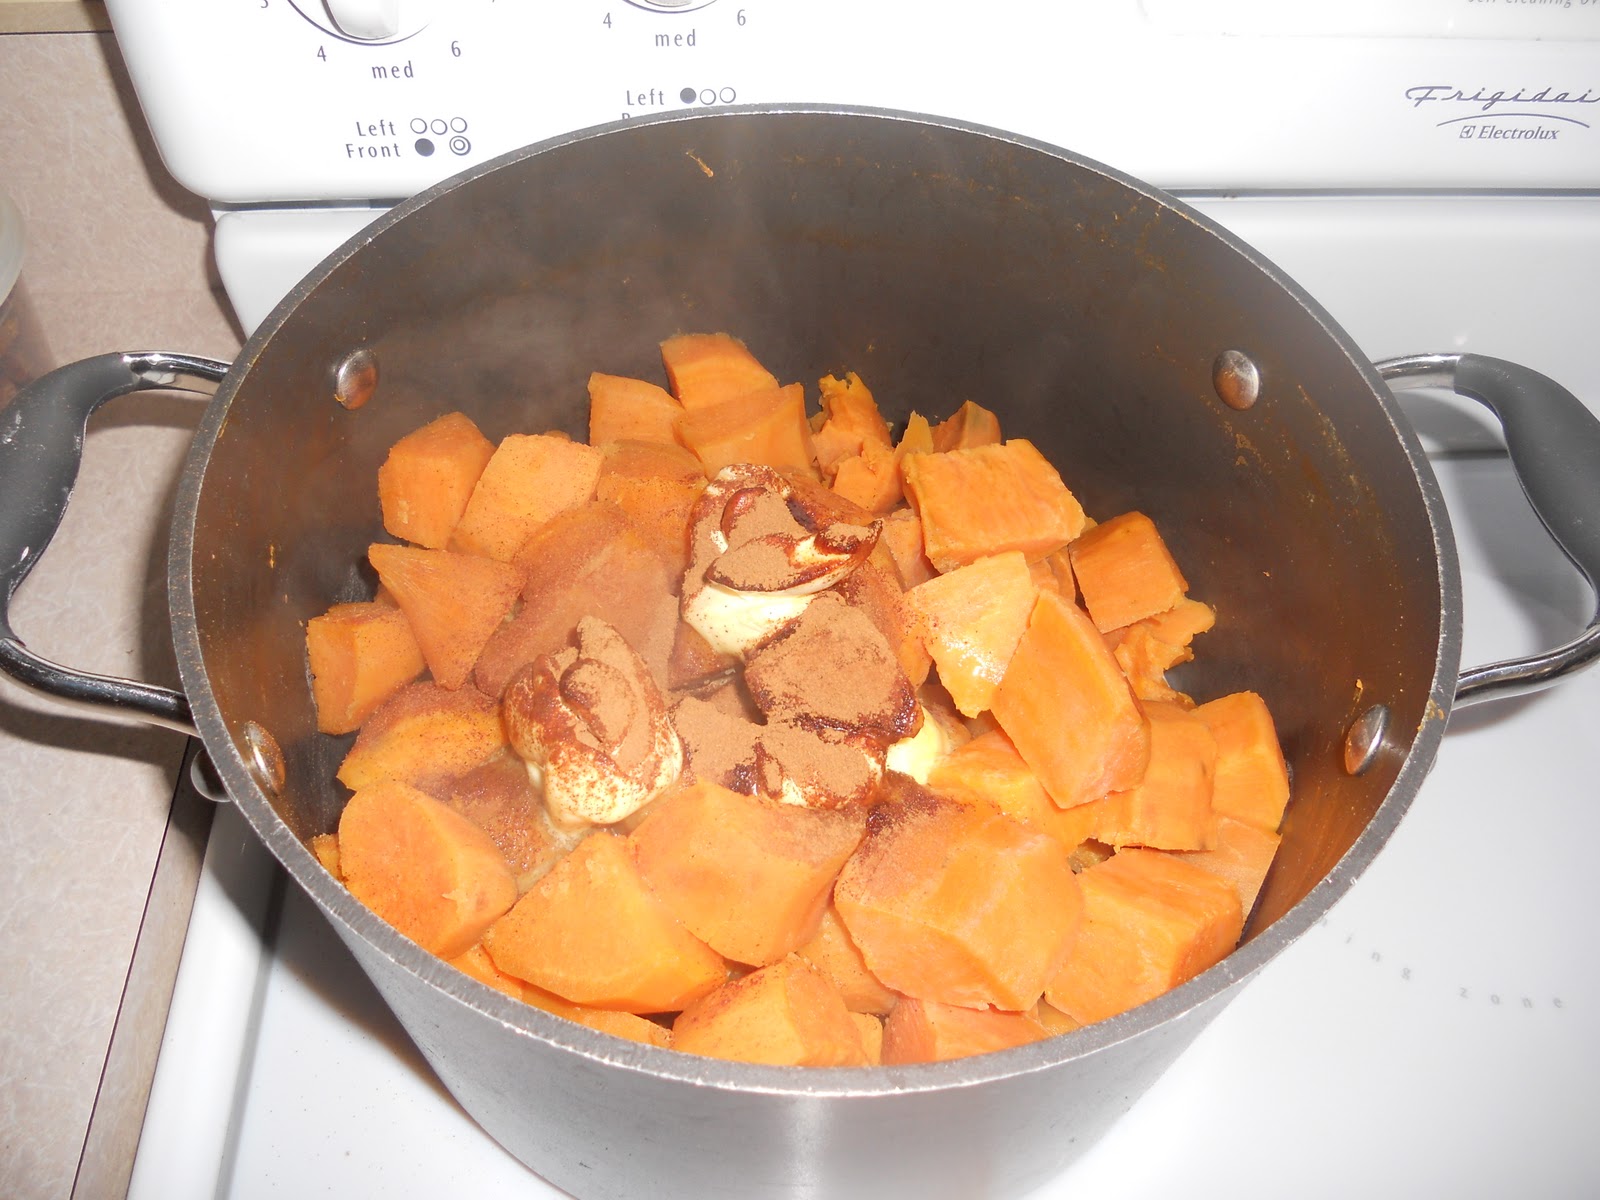
So this recipe is also from Thanksgiving. My mom requested that I find something to do with sweet potatoes. Personally, I just like them baked with butter or roasted with olive oil. I think they have such a great flavor and I don't like to mess with it too much. Last year, I tried the typical casserole with the syrup and marshmallows. It was a huge flop. The whole thing was still sitting there at the end of dinner. So I looked for something that would bring out the sweetness of the potatoes but not turn it into dessert. I found this and it worked beautifully! The sugar on top gave just the right amount of sweetness (and a little crunch too!).  The only mistake I made was making enough for a large army when my family only consists of seven people. Luckily, my grandmother said it freezes well so nothing was wasted :)

Try this recipe if you're looking for a sweet potato recipe that's just a little sweet and a lot tasty :)

Mashed Sweet Potato Brulee (14 ½ cup servings – 114 cals) from Skinnytaste
  • 5 1/2 lbs sweet potatoes, peeled and boiled until soft
  • 3/4 cup 1% milk
  • 3 tbsp light butter, softened
  • 1/2 tsp salt
  • 1/4 tsp ground cinnamon
  • 1/8 teaspoon ground nutmeg
  • 1/2 cup unpacked light brown sugar

1.  When the potatoes are cooked and soft, combine them with milk, light butter, salt, cinnamon and nutmeg and mash or puree until smooth.  
2.  Spoon into a 9 x 9 or 11 x 7-inch baking dish.
3.  Preheat the broiler. Sprinkle 1/2 cup brown sugar evenly over top. Broil 2 minutes or until sugar melts, careful not to burn. Let it stand until the melted sugar hardens (about 5 minutes).


Friday, September 9, 2011

Pesto Potato Salad

Hi there! I've been a little absent due to Hurricane Irene and Labor Day weekend festivities. Hurricane Irene left me with sporadic phone and internet service for about a week.  With all of the inconveniences that this caused my life, I figured that it was safest to not update my blog because I just couldn't force myself to be my usual witty, charming, and friendly self (...ha).  But now that most of my technological devices are up and running and I had a job interview today, I'm feeling much better so I can put some positive energy into the blog :)

Also, THE PACKERS WON LAST NIGHT!  This green potato salad is the closest I have for a festive recipe right now.  But be on the lookout for some great appetizers during this season!

I love barbecues. Grilled meat, fattening dips, fruity desserts, creative salads, and (best of all) CONSTANT SNACKING!  Right up my alley.  When I got back from Costa Rica, my grandmother had a huge family barbecue to celebrate my homecoming.  I asked my mom what supplies she had to make a dish and she pointed to a sack of red potatoes and celery.  She said that she figured we could just make potato salad.  An overwhelming feeling of disappointment set in...

I do NOT like potato salad.  Now, don't get me wrong, I'll eat it if it's all that's around.  But with all the food at a barbecue, potato salad is the one thing I skip on to make room for everything else.  There's a couple reasons for this.  I don't particularly like mayo.  Maybe a little on a sandwich if it has a special flavor (pesto, chipotle, cranberry, garlic, etc) and if there's no mustard around. I really don't like mayo on a hot day.  For some reason it just doesn't sit well in my stomach.  Also, I generally think potato salad is really boring. Most of the time it's pretty flavor- and colorless and you can't really eat it any other way but by itself.  Lame.

Well I was not going to be caught dead bringing a lifeless potato salad to a party meant to celebrate me.  So I hunted through my mom's cabinets and found some goodies.  I found: pine nuts, pesto, red pepper, onions, and eggs.  And those became the additional ingredients.  I think that my creation turned out pretty darn good! It was definitely more flavorful than a traditional potato salad and had a variety of textures.  The only two negatives were: I did have to use some mayo because the potatoes were a little dry and some people were initially freaked out by the green color.  I just stood by the bowl and hassled people to try it until they put a little scoop on their plate. Even the pickiest eaters went back for seconds!  Give this new twist on an old favorite a try!


NOTE: This recipe makes a TON! Good thing it turned out well because my mom and I were eating it for a week straight.

Ingredients:
  • 2 lbs of red skinned potatoes, quartered and boiled until tender
  • 1 red pepper, chopped
  • 1 red onion, chopped
  • 1/2 bundle of celery, chopped
  • 6 eggs, hard boiled and chopped
  • 1 cup of pine nuts (or however much you like)
  • 1 1/2 jars of pesto 
  • mayo (add until it's at your desired consistency) 
          **POSSIBLE ADDITIONS: black olives, feta, sun-dried tomatoes
  1.  Start a large pot of water to boil.  When boiling, add potatoes and cook until tender (about 30 minutes).
  2. While potatoes are cooking, chop red pepper, onion, celery, and hard boiled eggs and put in a large serving bowl.  Add pine nuts. 
  3. Drain potatoes. Let cool for about 10 minutes. Add to the bowl.
  4. Add the jars of pesto.  Mix.  Add mayo a little at a time until the salad is at the desired consistency.

Wednesday, August 31, 2011

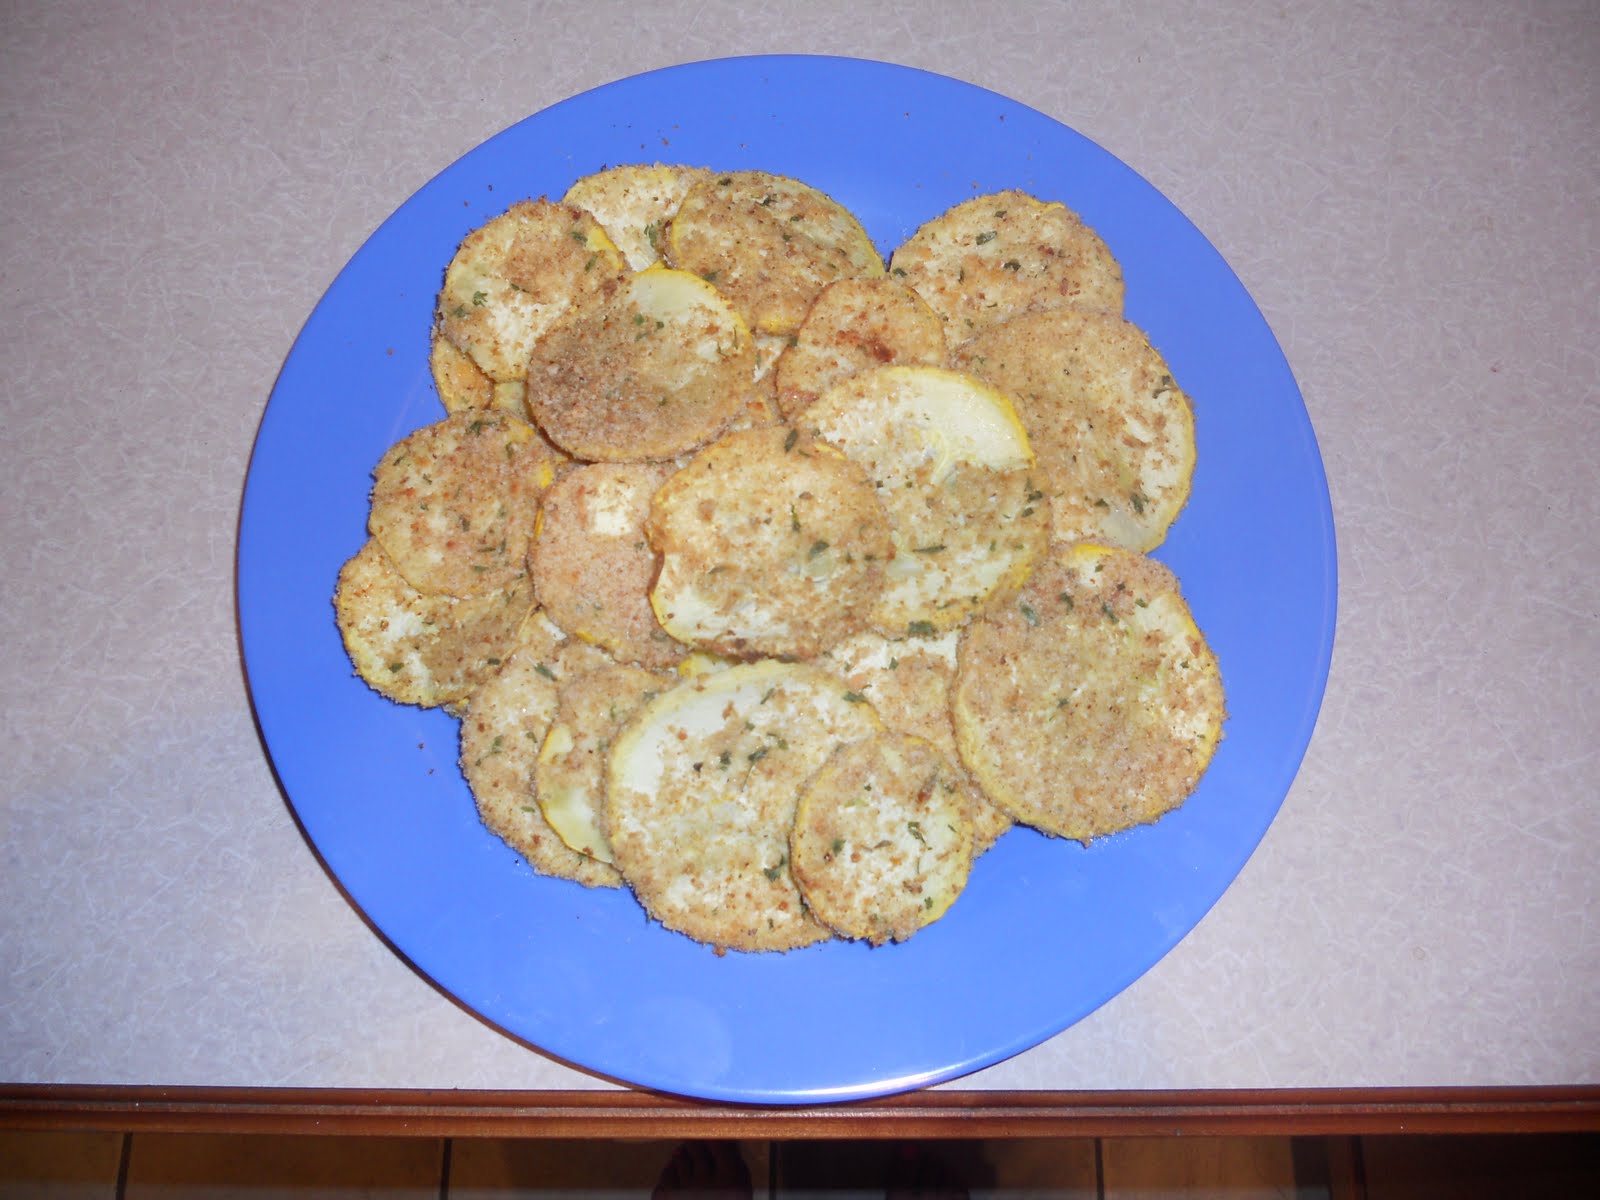
Oven Fried Squash

My grandfather is retired and is constantly starting new projects or picking up new hobbies to keep himself busy.  This summer, the activity of choice was a garden.  Thank goodness!  I think this is much more realistic than his last hobby which I can only describe as preparing for the apocalypse.  For Christmas his gifts to my mother and I were car survival kits, complete with candles, freeze dried food, matches, small pots, flashlights, and power bars.  When I went away to Costa Rica, he gave me all sorts of hidden weapons to defend myself like a mini nunchuk and a flashlight with a blinder. Needless to say, this gardening hobby is much more up my alley!

Right now the garden is mostly producing zucchini and squash, which is perfect because those happen to be my favorite vegetables.  The zucchinis and squash that he's been giving me are absolutely GIGANTIC and I was worried that they would be too seedy in the middle to use.  But they aren't so I started to put them to good use.

One of my favorite recipes that my mom used to make was fried zucchini and squash.  She would dip squash and zucchini in an egg wash, bread crumbs, and then fry them in her electric frying pan.  I ate them like chips, to the point where I think I could eat a pound in the blink of an eye.  Now that I think about it, that's kind of gross because my mom used to put them on a paper towel for the oil to drain a little bit and the paper towels would be totally soaked through and puddles would form on the plate. 

Well now that I'm older and actually like the taste of vegetables more than grease (most of the time), I wanted to think of a healthier and lighter way to make it.  Not to mention, frying is kind of pain in the butt because it makes a big mess and sprays oil all over the place.  I decided to try to make them in the oven, which would completely eliminate the oil component. It worked and they were delicious! I only used squash this time around because the zucchini was so gigantic that the slices would have lost the fun chip-like quality.  The only thing I would change is to raise the oven temperature at the end of the cooking time so that the bread crumbs crisp up a little more.  Also, although I think they are perfect plain, I'd like to try to find some sort of dipping sauce (maybe something with lemon and basil?).  These are so easy, delicious, healthy, and addictive so try it out!  The recipe is after the pictures :)


Oven Fried Squash

Ingredients:  
  • 2 medium squash, cut into 1/8-inch slices
  • 1/2 cup seasoned dry bread crumbs
  • 1/8 teaspoon ground black pepper
  • 1/8 teaspoon of garlic powder
  • 4 tablespoons grated Parmesan cheese
  • 2 egg whites
Directions:
  1. Preheat the oven to 475 degrees. 
  2.  Spray a baking sheet with cooking spray.
  3. In one small bowl, stir together the bread crumbs, pepper and Parmesan cheese. Place the egg whites in a separate bowl. Dip zucchini slices into the egg whites, then coat the breadcrumb mixture. Place on the baking sheet.
  4. Bake for 7 minutes in the preheated oven, then turn over and bake for another 7 to 10 minutes, until browned and crispy.