Showing posts with label dessert. Show all posts

Tuesday, September 25, 2012

Funfetti Cake Dip


Dessert dips are dangerous. If they aren’t proportioned, I end up hanging out by the dip and eating it during the whole party while somehow convincing myself that I didn’t really eat anything. I figure, if I only eat one tiny bite at a time and I don’t use a plate, the calories don’t count. That’s true, right?

Well, with this dip, you don’t have to feel guilty! It’s low in fat and calories and I swear you would never know. And for all you cake batter lovers, this tastes like the real deal. But it won’t give you salmonella so it’s even better! It is super sweet so all the kids at my party loved it but it was too much for some of the older women (my grandmother found it disgusting). By the way, when does that happen? What’s the magic age when things start becoming “too sweet”? It’d be nice for my waistline but I’m definitely dreading that day.

I served it with mini graham crackers and animal crackers. Nilla wafers would be good too! It reminded me of eating Dunkaroos when I was in elementary school. I used to eat all of the kangaroo shaped crackers plain. Then I would save the circular ones and use all of the frosting to make a couple GIANT cookie-frosting sandwiches. The good ole days!

Oh, and it has sprinkles. Rainbow sprinkles never fail to make my day better. How can you not be happy when eating something so bright and cheerful? Try frowning and eating sprinkles. I bet it’s impossible.

Funfetti Cake Dip (24 ¼ cup servings – 105 cals) from Eat Yourself Skinny!
·         1 (18.9 oz) box Funfetti cake mix
·         2 cups fat-free vanilla yogurt
·         1 cup lite Cool Whip
·         Fat-free animal crackers

1.       In a large bowl, mix together cake mix, plain yogurt and Cool Whip until completely combined and you see no more lumps.  Cover with plastic wrap and allow to chill for about 4 hours. 
Garnish with additional sprinkles if desired and serve with animal crackers, graham crackers, and/or Nilla wafers! 


Why do sprinkles make everything better?

Saturday, September 8, 2012

Strawberry-Filled Cupcakes with Lime Cream Cheese Frosting


Here is the final piece of the Mexican-themed meal! I’m obviously obsessed with dessert so I couldn’t have a meal without it. I debated trying to make some sort of traditional Mexican dessert but decided against it in favor of some cupcakes in hopes that my family would be more likely to eat them quickly!

I decided on these strawberry-filled cupcakes with lime cream cheese frosting to go with the strawberry margaritas.  Feel free to compliment me on how well-planned and clever that was J

For the cupcakes, I just used my standard boxed cake mix with a can of diet soda. I know there are probably a bunch of people who haven’t warmed up to that idea yet. I generally only use it for cupcakes that are filled with something. I figure, if I’m going to be scooping out half of the cupcake anyway, there’s really no point in making something so labor intensive.

The frosting is the real focus here. The combination of cream cheese and lime reminded me of key lime pie. It was creamy and rich with a little bit of a tart bite. The only thing that I might try to do differently is play with the amount of sugar to change the consistency.  It was slightly runny, like almost somewhere between a buttercream and a glaze, so it had to be spread onto the cupcakes rather than piped. This was fine for these cupcakes because a little goes a long way but I’d be interested to see what a thicker frosting would taste like.

Make these, drink the matching margaritas, and be merry!

Strawberry-Filled Cupcakes with Lime Cream Cheese Frosting (16 cupcakes)
·         1 box yellow cake mix
·         1 can diet lemon-lime soda
·         1 pint fresh strawberries
·         1 Tbsp sugar
For the frosting
·         4 oz cream cheese
·         2 ½ Tbsp butter
·         2 ¼ cups powdered sugar
·         1 tsp vanilla
·         1 Tbsp lime juice
·         Zest of one lime
1.       Preheat the oven to the temperature indicated on the cake box. Line muffin tin with cupcake liners.
2.       For the filling: Finely chop the pint of strawberries. Place in a bowl and mix with the sugar.
3.       For the frosting:  In a stand mixer fitted with the paddle attachment, cream together the cream cheese and butter until smooth, about 2 minutes. Add the vanilla, lime juice, and lime zest. Add in the sugar ½ cup at a time and mix until smooth.
4.       Mix the cake mix and the can of soda together until the batter is smooth. Fill cupcake liners ¾ full. Bake as directed.
5.       Allow the cupcakes to cool completely. Cut out the center of the cupcakes and reserve the middles in a separate bowl.
6.       Fill the cupcakes with the diced strawberries. Cover with a small amount of the reserved cupcake.
7.       Frost the cupcakes.
8.       Chill until ready to serve.


it's like a margarita... in a cupcake!


Wednesday, August 22, 2012

Raspberry Tiramisu


I have lots of deal-makers and breakers. That goes for T.V. shows, clothing, men, and food. Let me share some with you.

T.V. deal-makers: total trash, anything food related, lots of drama, Christopher Meloni
T.V. deal-breakers: anything requiring higher-order thinking skills, cartoons, shows about people whose lives make me jealous

Clothing deal-makers: things that give the illusion of curves to my lack of body shape, bright colors, black, things that go can go from work appropriate to night out with a simple twist like popping a button or removing a tank-top
Clothing deal-breakers: dry clean only, things that need to be ironed, rompers (I HATE THEM)

Man deal-makers: considerate to me and others, fun-loving (because I can be a little neurotic…), eats all types of food, common interests.
Man deal-breakers: Please contact me for my current list of horrific ex-boyfriends and atrocious dating experiences. There’s a lot.

Food deal-makers: interesting flavor combinations, anything sweet, anything covered in peanut butter, pretty much anything edible. I’m not picky, obviously.
Food deal-breakers: okra, clams/mussels/oysters, anything bland.

So, this recipe probably looks familiar, right? It looks a lot like the one that I made for my grandmother’s birthday. But there are a couple differences that could be deal-makers or breakers for certain people.

If you love raspberries, especially fresh ones, the second recipe is probably for you. If you’re not a huge raspberry fan, you would probably prefer the first one I posted because it gives you the option of only adding a little bit of raspberry sauce or none at all. I also prefer my ladyfingers to be soaked in something. In the first recipe, the ladyfingers would have been a little too dry for me if I didn’t drown them in the raspberry sauce before digging in. In this recipe, the ladyfingers are brushed with a mixture of raspberry jam and orange juice, which makes them flavorful and moist. I love the very subtle orange flavor the orange juice in the jam mixture and the orange zest in the filling gives this dessert.

Basically if you’re not a huge fan of raspberry, which my mother and sister are not, the first recipe would be a better fit for you. I, on the other hand, would consider raspberries to be one of my favorite fruits so I prefer this recipe.

Try both and let me know what you think!

Raspberry Tiramisu
  • ·         1/2 cup seedless raspberry jam
  • ·         zest and Juice of 1 orange
  • ·         1 cup ricotta cheese, at room temperature
  • ·         2 oz cream cheese, at room temperature
  • ·         1 cup whipping cream
  • ·         1/4 cup sugar
  • ·         1 teaspoon pure vanilla extract
  • ·         2 packages of lady fingers
  • ·         about 2 cups fresh raspberries
  • ·         Confectioners' sugar, for serving

1.  Reserve 1 tablespoons of orange juice. Stir the jam and remaining orange juice in a small bowl to blend.
2.  Combine the ricotta, cream cheese, and remaining 1 tablespoon of orange juice in a large bowl to blend. Using an electric mixer, beat the cream, sugar, and vanilla in another large bowl until soft peaks form. Fold orange zest into whipped cream.
3.  Using a large rubber spatula, stir 1/4 of the whipped cream into the mascarpone mixture to lighten. Fold the remaining whipped cream into the mascarpone mixture.
4.  Line the bottom and sides (the long way) of a 8x8 glass baking dish or other decorative serving dish with ladyfingers. Spread half of the jam mixture over the ladyfingers. Spread half of the mascarpone mixture over the jam mixture, then cover with half of the fresh raspberries. Repeat layering with the remaining ladyfingers, jam mixture, mascarpone mixture and raspberries.
5.  Cover and refrigerate at least 3 hours overnight (which is what I did) to let the flavors blend.
6.  Dust with the confectioners' sugar and serve.


whipped cream
filling
layer of ladyfingers
jam and orange juice mixture
filling in the tiramisu
middle layer of raspberries!
ready to be served!
individual slices :)

Saturday, August 11, 2012

Creamy Ladyfinger Cake with Raspberry Sauce

Ok, so this is the FINAL piece of my grandmother's birthday dinner.

She gave me this recipe and asked if I would try it out. I had never used lady fingers before so I was a little nervous. But she said that it tasted just how she remembered and everyone loved it!

It was basically like a very light version of cheesecake! The lady fingers make for a very light and fluffy crust and the filling isn't nearly as dense as cheesecake but is still fairly rich from the cream cheese and heavy cream. Because it's lighter, you can eat a big slice without feeling sick, which I love :)

This recipe looks very elegant but comes together very quickly because the lady fingers are premade, the filling whips up quickly, and the "sauce" is ready as soon as the carton of frozen raspberries in juice thaws. Hey, that's what the recipe called for! So for once it wasn't me being a lazy bum. Surprising, right?

The leftovers also hold up very well. I thought that the ladyfingers might get soggy but I ate it for 3 days after and it was delicious every time!  Just keep the sauce in a separate dish and add it right before you eat it.

On a side note, I'm very glad that this dessert worked out so well because the other dessert was a total flop. At almost every single holiday, my family makes a chocolate pie. It's just a pie or graham cracker crust filled with chocolate pudding.

Now, given how often I have: 1) seen this pie made, 2) eaten this pie, and 2) made recipes far more complex than this simple pie... you would think that I would be able to make this with my eyes closed.  NOPE. It came out like soup. Why? Because I cannot seem to read directions all the way through. I read the first part of the directions and followed them for pudding. If I would have continued to read, I would have noticed that the recipe said to use less milk if using the pudding for a pie.  I've learned my lesson because the pie came out looking like this.

mushy pie
yeah, it looks like poop.


Everyone laughed at me. Ms. Expert-Chef-In-Training can't even make an instant pudding pie. Awesome. At least I'm not too ashamed acknowledge my epic failures.

I just think that my culinary skills did not want to be stifled but something so boring and simple so my brain just rejected the pie so that people would focus their attention the other creamy, tart, homemade, beautiful dessert. That's my excuse and I'm sticking to it.

Creamy Ladyfinger Cake with Raspberry Sauce (8 servings)

  • 2 packages of lady fingers
  • 1 8 oz cream cheese (I used fat free)
  • 1 3 oz cream cheese
  • 1 cup granulated sugar
  • 1 tsp vanilla
  • 1 pint heavy cream 
  • 2 10 oz containers of frozen raspberries in juice
  1. Line the bottom of a 9-inch springform pan with lady fingers. Line the sides of the springform pan with ladyfingers (going up and down, the outside facing the pan so that they will show when the pan is removed). 
  2. Beat together the 2 packages of cream cheese, sugar, and vanilla until smooth. Set aside.
  3. Beat the heavy cream until stiff peaks form. Gently mix the whipped cream into the cream cheese mixture until completely combined. Do not over-mix.
  4. Put half of the mixture into the springform pan. Smooth it over with a spatula. Place another layer of ladyfingers on top of the cream cheese mixture. Layer the other half of the cream cheese mixture on top of the lady fingers. 
  5. Chill the cake overnight. Serve with thawed raspberries in juice. We chose to add the raspberry sauce to each individual slice so that the cake wouldn't get soggy. 

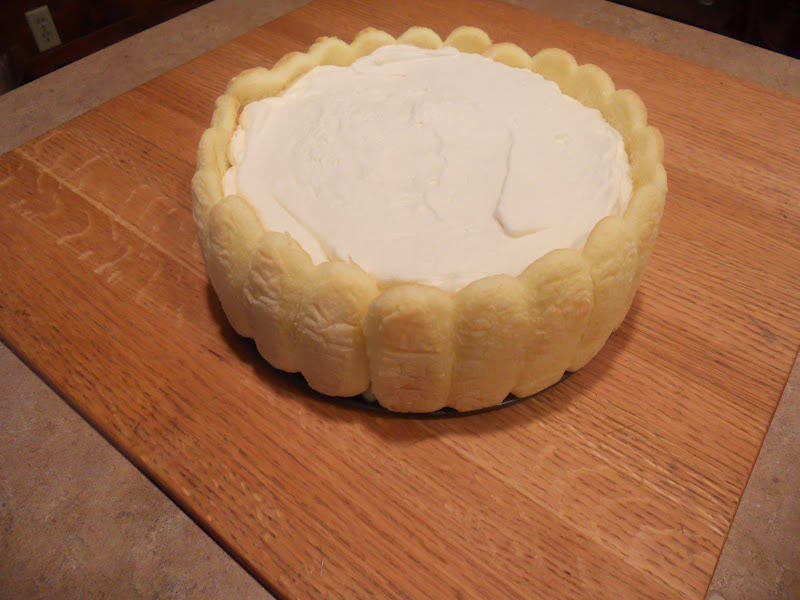
um, I probably could have made this look a little nicer...

the base

beginnings of layer two
ready to chill overnight
so pretty!
with raspberries :)


Monday, July 9, 2012

Patriotic Trifle

I was looking through my camera and I realized that I forgot to post my 4th of July recipe! Food blogger fail. Especially for me because I get really excited about making themed food. And parties. And outfits. I blame my love for all things themed on my four years of sorority life <3

I made this patriotic trifle to bring to a family friend's barbeque. I had to whip something up really quickly because I was soaking up the sun all day and did not feel like being cooped up in the kitchen. I threw together this trifle in about 30 minutes so it was perfect!

This dessert is easily adaptable. I used angel food cake, strawberry puree, vanilla pudding, and blueberries and strawberries for the layers. You can use any flavor of cake, fruit puree/alcohol (to moisten the cake), pudding, and fruit/candy topping that you'd like. The possibilities are endless! My mom makes a boozy version with chocolate cake, Bailey's, chocolate pudding, and Heath Bar pieces. Everyone goes absolutely crazy for it. The important thing to remember is the order of the layers:

  1. Cake
  2. Fruit puree/alcohol
  3. Pudding
  4. Cool whip
  5. Toppings (fruit/candy)
  6. Repeat!
I cannot wait to experiment with more flavor combinations!  I will definitely be making plenty of other versions because: it's so easy to put together; it tastes great; and it's very pretty if the layers are carefully assembled. This is perfect for a party because it's cheap and makes a ton of servings!

So happy belated 4th of July! I'm within a week so it's still acceptable to celebrate, right?

Patriotic Trifle
  • 2 angel food cakes
  • 2 boxes instant vanilla pudding (I used sugar free)
  • 1 quart whole milk
  • 1 large container Cool Whip (I used fat free)
  • 1 Tbsp granulated sugar
  • 2 Tbsp water
  • 2 16 oz containers strawberries, sliced
  • 2 pints blueberries
  • 1 banana, sliced
  1. Prepare the instant pudding according to the directions on the back of the package (I used 1 quart of whole milk for two packages of pudding mix). Chill in the refrigerator for about a half hour.
  2. Puree 1 cup of strawberries with the sugar and water. Set aside.
  3. Tear up one angel food cake into bite-sized pieces. Place in an even layer at the bottom of a large, clear serving bowl.
  4. Pour half of the strawberry puree over the cake layer. 
  5. Spread half of the pudding evenly over the cake. Make sure the pudding goes all the way to the sides of bowl so the separation of layers can be seen from the outside of the bowl.
  6. Spread half of the Cool Whip over the pudding layer in the same manner.
  7. Reserve enough strawberries and blueberries for the flag decoration. Combine the rest of the blueberries and strawberries. Make an even layer of fruit. 
  8. Repeat steps 3 through 6.
  9. Create an American flag out of the remaining fruit, as shown in the pictures below.


look at those layers!
Happy 4th of July, America!
yeah, that's a themed dessert and a matching outfit :)
diggin' in!

Thursday, June 14, 2012

Chocolate Dipped Triple Peanut Butter Sandwich Cookies

I made these cookies on June 12th for National Peanut Butter Cookie Day! I officially proclaim this to be a national holiday in my life because I consider peanut butter to be one of my main food groups. So obviously I had to make something epic to celebrate. And the result was....

Happy Peanut Butter Cookie Day!
Ken enjoying a peanut butter cookie sandwich sundae. I do NOT mess around with sweets.

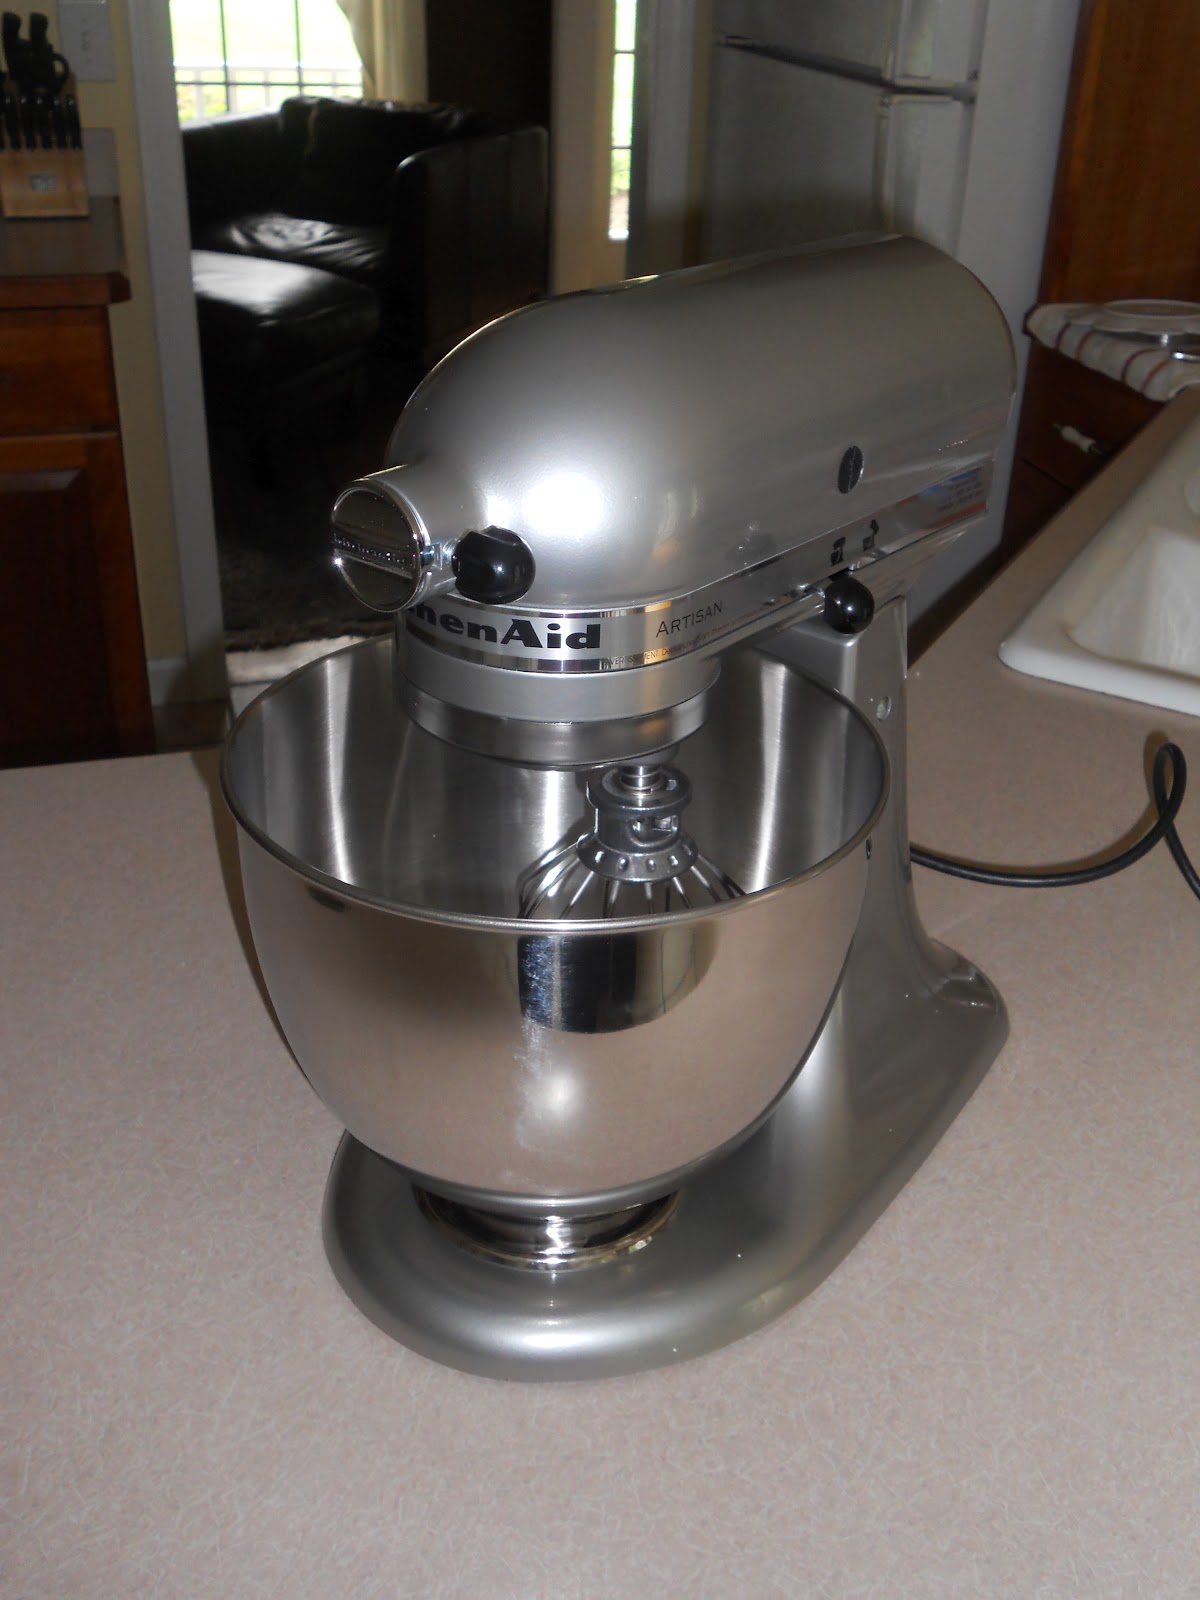
Also, it was a perfect excuse to FINALLY use the stand mixer that I got for Christmas! I've been dying to use it but didn't bring it to school. I knew that if my housemates touched it, I would likely commit homicide. Then I'd NEVER find a teaching job.

I've also named her. Her name is Mable. Able Mable will help me accomplish outstanding culinary wonders.


isn't she stunning?
As soon as I saw this recipe, I knew I had to try it. Considering it was PEANUT BUTTER cookie day, I didn't want to jumble up this dessert with too many other ingredients (I know... who am I?). And I wanted a peanut butter overload (that sounds more like the Kelsy you've come to know). How can you go wrong with a creamy peanut butter filling smushed between two crisp peanut butter cookies? It's covered with just enough chocolate to use to make some honey roasted peanut piece stick for a little extra crunch!

This peanut butter cookie recipe yields a crispy peanut butter cookie that holds its shape. Though I also love soft peanut butter cookies, I think these thick crispy ones are better suited for the crunchy filling and the chocolate coating because they are more sturdy. The dough is a little crumbly so I found it easiest to gather about a tablespoon of dough, roll it in my hands to get it to stick together, and then press it flat with the prongs of a fork. I love the use of brown sugar in both the cookies and the filling. I really think it deepens the peanut butter flavor as well as sweetens it whereas granulated or powered sugar just sweetens the peanut butter. I am in absolute love with these.

These come together really easily. The most time consuming part of the process was dipping the final sandwich in the chocolate and covering them with peanuts. Melted chocolate and I have a love hate relationship. I hate working with it but love consuming it. I had quite a bit of the peanut butter filling left over. It didn't last long because I kept snacking on it with apples, crackers, and, of course, my fingers. Don't worry, the spreading of germs was not an issue because I had NO intentions of share my extra stock with anyone.

I'd say that making these is a must due to their ease and the fact that the final product looks very impressive. Also, they are a peanut butter fanatic's dream. I'm in heaven.


Chocolate Dipped Peanut Butter Sandwich Cookies (25-30 sandwich cookies) from Joy the Baker
For the Cookies:
  • 1/2 cup unsalted butter, at room temperature
  • 3/4 cup smooth peanut butter
  • 1/2 cup granulated sugar
  • 1/2 cup firmly packed brown sugar
  • 1 egg
  • 1 1/2 cups flour
  • 1/2 teaspoon baking powder
  • 3/4 teaspoon baking soda
  • 1/4 teaspoon kosher salt
For the Filling:
  • 2 cups crunchy peanut butter
  • 1/2 cup unsalted butter, at room temperature
  • 1/4 cup heavy whipping cream
  • 1/2 cup powdered sugar
  • 1/4 cup firmly packed brown sugar
  • 1 teaspoon vanilla extract
For the Optional Coating:
  • 10 ounces semi sweet chocolate chips,
  • 1 cup honey roasted peanuts, coarsely chopped
1.       Preheat the oven to 375 degrees F and line baking sheets with parchment paper.  Spray with cooking spray.
2.       Using a stand mixer with a paddle attachment, beat the butter and peanut butter on medium speed until well combined.  Add the sugars and beat until light and fluffy (about 2 minutes).
3.       Add the egg and beat on medium speed for 1 minute.
4.       In a medium bowl, whisk together the flour, baking powder, baking soda and salt.  Add the flour mixture to the peanut butter mixture and beat on low until just combined.  Refrigerate the dough for at least 30 minutes.
5.       Scoop up a little less than a tablespoon of dough and roll it into a ball. Place the dough balls on the cookie sheet about 1 1/2-inches apart.  Use the prongs of a fork to press the cookies flat (I pressed once vertically and once horizontally).  Bake for 7-8 minutes until the cookies are golden brown along the edges.
6.       For the filling:  Use a stand mixer with a paddle attachment to beat the butter, peanut butter and heavy cream together on medium speed until light and fluffy, about 2 minutes.
7.       Add the powdered sugar, brown sugar, vanilla, salt and beat on medium speed until combined.
9.       Spread generous amounts of the filling onto the flat bottom of a cookie.  Top with another cookie, ridge side up.  
10.  Melt the chocolate in the microwave (I melt it in 30 second increments, stirring after each 30 seconds). Dip one side of the sandwich in chocolate or spread the chocolate on one side with a knife. 
11.  Set a wire rack on top of a sheet of waxed paper.  Set the dipped cookies on the wire rack. Sprinkle the chocolate with chopped nuts immediately after dipping so they stick. Transfer the cookies to the fridge for 10 minutes for a quick drying time.


my standmixer making my life 1000 times easier!
the dough.
shaped and prebaked
baked cookies - pre-sandwich
frosting with powdered AND brown sugar
filling these babies!
soooooo many cookies!
finished and drying!
plated and ready to be enjoyed :)