Showing posts with label cookies. Show all posts

Thursday, June 14, 2012

Chocolate Dipped Triple Peanut Butter Sandwich Cookies

I made these cookies on June 12th for National Peanut Butter Cookie Day! I officially proclaim this to be a national holiday in my life because I consider peanut butter to be one of my main food groups. So obviously I had to make something epic to celebrate. And the result was....

Happy Peanut Butter Cookie Day!
Ken enjoying a peanut butter cookie sandwich sundae. I do NOT mess around with sweets.

Also, it was a perfect excuse to FINALLY use the stand mixer that I got for Christmas! I've been dying to use it but didn't bring it to school. I knew that if my housemates touched it, I would likely commit homicide. Then I'd NEVER find a teaching job.

I've also named her. Her name is Mable. Able Mable will help me accomplish outstanding culinary wonders.

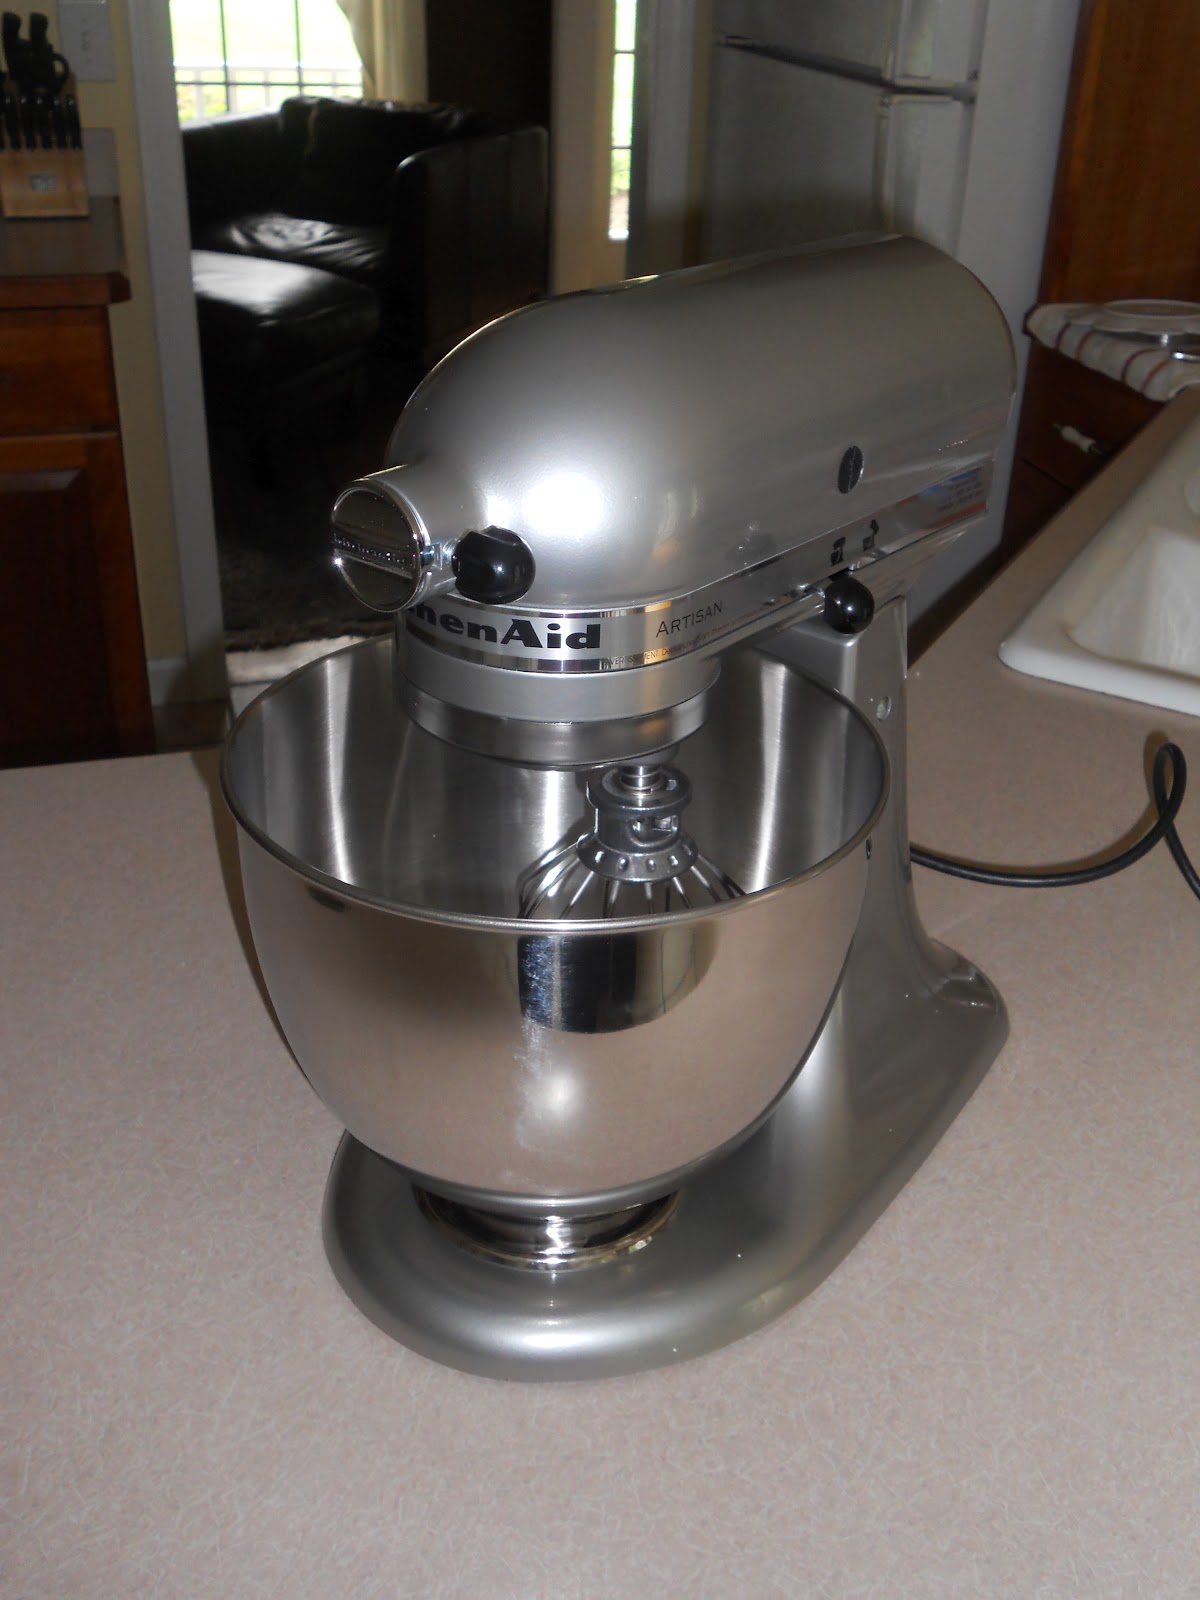
isn't she stunning?
As soon as I saw this recipe, I knew I had to try it. Considering it was PEANUT BUTTER cookie day, I didn't want to jumble up this dessert with too many other ingredients (I know... who am I?). And I wanted a peanut butter overload (that sounds more like the Kelsy you've come to know). How can you go wrong with a creamy peanut butter filling smushed between two crisp peanut butter cookies? It's covered with just enough chocolate to use to make some honey roasted peanut piece stick for a little extra crunch!

This peanut butter cookie recipe yields a crispy peanut butter cookie that holds its shape. Though I also love soft peanut butter cookies, I think these thick crispy ones are better suited for the crunchy filling and the chocolate coating because they are more sturdy. The dough is a little crumbly so I found it easiest to gather about a tablespoon of dough, roll it in my hands to get it to stick together, and then press it flat with the prongs of a fork. I love the use of brown sugar in both the cookies and the filling. I really think it deepens the peanut butter flavor as well as sweetens it whereas granulated or powered sugar just sweetens the peanut butter. I am in absolute love with these.

These come together really easily. The most time consuming part of the process was dipping the final sandwich in the chocolate and covering them with peanuts. Melted chocolate and I have a love hate relationship. I hate working with it but love consuming it. I had quite a bit of the peanut butter filling left over. It didn't last long because I kept snacking on it with apples, crackers, and, of course, my fingers. Don't worry, the spreading of germs was not an issue because I had NO intentions of share my extra stock with anyone.

I'd say that making these is a must due to their ease and the fact that the final product looks very impressive. Also, they are a peanut butter fanatic's dream. I'm in heaven.


Chocolate Dipped Peanut Butter Sandwich Cookies (25-30 sandwich cookies) from Joy the Baker
For the Cookies:
  • 1/2 cup unsalted butter, at room temperature
  • 3/4 cup smooth peanut butter
  • 1/2 cup granulated sugar
  • 1/2 cup firmly packed brown sugar
  • 1 egg
  • 1 1/2 cups flour
  • 1/2 teaspoon baking powder
  • 3/4 teaspoon baking soda
  • 1/4 teaspoon kosher salt
For the Filling:
  • 2 cups crunchy peanut butter
  • 1/2 cup unsalted butter, at room temperature
  • 1/4 cup heavy whipping cream
  • 1/2 cup powdered sugar
  • 1/4 cup firmly packed brown sugar
  • 1 teaspoon vanilla extract
For the Optional Coating:
  • 10 ounces semi sweet chocolate chips,
  • 1 cup honey roasted peanuts, coarsely chopped
1.       Preheat the oven to 375 degrees F and line baking sheets with parchment paper.  Spray with cooking spray.
2.       Using a stand mixer with a paddle attachment, beat the butter and peanut butter on medium speed until well combined.  Add the sugars and beat until light and fluffy (about 2 minutes).
3.       Add the egg and beat on medium speed for 1 minute.
4.       In a medium bowl, whisk together the flour, baking powder, baking soda and salt.  Add the flour mixture to the peanut butter mixture and beat on low until just combined.  Refrigerate the dough for at least 30 minutes.
5.       Scoop up a little less than a tablespoon of dough and roll it into a ball. Place the dough balls on the cookie sheet about 1 1/2-inches apart.  Use the prongs of a fork to press the cookies flat (I pressed once vertically and once horizontally).  Bake for 7-8 minutes until the cookies are golden brown along the edges.
6.       For the filling:  Use a stand mixer with a paddle attachment to beat the butter, peanut butter and heavy cream together on medium speed until light and fluffy, about 2 minutes.
7.       Add the powdered sugar, brown sugar, vanilla, salt and beat on medium speed until combined.
9.       Spread generous amounts of the filling onto the flat bottom of a cookie.  Top with another cookie, ridge side up.  
10.  Melt the chocolate in the microwave (I melt it in 30 second increments, stirring after each 30 seconds). Dip one side of the sandwich in chocolate or spread the chocolate on one side with a knife. 
11.  Set a wire rack on top of a sheet of waxed paper.  Set the dipped cookies on the wire rack. Sprinkle the chocolate with chopped nuts immediately after dipping so they stick. Transfer the cookies to the fridge for 10 minutes for a quick drying time.


my standmixer making my life 1000 times easier!
the dough.
shaped and prebaked
baked cookies - pre-sandwich
frosting with powdered AND brown sugar
filling these babies!
soooooo many cookies!
finished and drying!
plated and ready to be enjoyed :)

Sunday, April 22, 2012

Cookies and Cream Cupcakes

Happy Earth Day!

I love "holidays" because they are an excuse to bake themed goodies. My friend, Michelle, and I decided to get together to bake some earthy cupcakes and drink fruity beverages. We decided on cookies and cream cupcakes and peach bellinis. YUM!

made with $5 Andre champagne and peach Bacardi with frozen blueberries for ice :)

The cupcakes are great for several reasons. The bottom is half of an Oreo cookie, cream side up. The cake portion is a dense vanilla cake with HUGE chunks of Oreo. I'm glad that I decided to go with chunks instead of crushing the Oreos because it gave the cupcake a nice texture. Oh, and the cream cheese frosting. No explanation necessary.

We decorated them with crushed Oreos to look like dirt and stuck some gummy worms on top. We also tried to make flowers on some with Skittles. Not quite as cute as we had envisioned but juuuuust as tasty. 


The only issue with this cupcakes is that we overcooked them a bit. We took them out and noticed that they were a little gooey on top so we decided to throw them back in the oven for a couple minutes. When we took them out and let them cool, the tops and sides were a little hard. That's when we realized that the gooey-ness was probably due to the cream in the Oreos melting. So don't be fooled by the sneaky goo! They still tasted delicious, just not as moist as they could have been.

Cookies and cream is always a crowd pleaser with kids and adults. And the surprise Oreo bottom takes the cupcakes to a whole new level. Making these for someone with a serious cookies and cream addiction? Serve it with a scoop of cookies and cream ice cream for a decadent overdose :)

Cookies and Cream Cupcakes (24 cupcakes) from Beantown Baker

For the cupcakes
  • 1 stick unsalted butter, at room temperature
  • 1 cup milk
  • 2 tsp vanilla extract
  • 2 1/4 cups flour, plus 2 Tbsp for the Oreo chunks
  • 1 tsp baking powder
  • 1/2 tsp salt
  • 1 2/3 cup sugar
  • 3 large egg whites, at room temperature
  • 1 pkg Oreo cookies
For the frosting
  • 4 oz cream cheese at room temp
  • 1/2 stick (4 Tbsp) butter at room temp
  • 1/2 Tbsp vanilla
  • 2 cups powdered sugar

  1. Preheat oven to 350F. Insert liners into a medium cupcake pan.
  2. Twist apart 24 Oreos. Place the wafer with filling on it, filling side up, in the bottom of each paper liner.
  3. Cut the remaining Oreo cookies into quarters with a sharp knife. Toss with 2 Tbsp flour and set aside.
  4. In a large bowl cream the butter until fluffy, about 3-5 minutes. Add the milk and vanilla and mix to combine.
  5. In a separate bowl mix together the flour, baking powder, and salt.
  6. Add the dry ingredients to butter mixture. Mix until integrated. Stir in sugar. With an electric mixer on low speed, beat for 30 seconds. Turn the mixer up to medium speed and beat for 2 minutes. Add the egg whites. Beat for 2 more minutes. Stir in the quartered cookies.
  7. Fill the cupcake lines three-quarters full. Bake for about 20 minutes (maybe even 18) or until a toothpick inserted in the center of cupcakes comes out clean. Cool cupcakes in the pan.
  8. While the cupcakes are cooling, make the frosting. Place the cream cheese in the bowl of your mixer. Beat on medium-high until completely smooth, 3-4 minutes. Add the butter and continue to cream until fluffy. Add vanilla extract. Add powdered sugar 1/4 cup at a time until desired consistency is reached.
  9. Frost the cupcakes. For dirt cupcakes, garnish with crushed Oreos and gummy worms. For regular cupcakes, garnish with crushed Oreos and half of an Oreo.


Oreo bottoms

flour coated Oreos

unbaked
baked
Happy Earth Day!


Wednesday, March 7, 2012

Lofthouse Cookies

These have been circulating around the food blog world for a long time. I might be the only person who hasn't done a post about them.

Not anymore!

These are WAY better than the store bought ones. Don't get me wrong, I will never turn down any kind of Lofthouse cookie. Except for the red velvet ones. Because Lofthouse cookies aren't supposed to be red. Anyway, my issue with the store bought ones is that they don't have enough frosting. So I always have to break off the edges because of the severe lack of frosting. Also it freaks me out that they are soft yet can stay "fresh" for about a century.

It's sort of like fast food burgers. Not enough burger, too much bun. Not enough real food, too much extra gunk that you don't want know about.

I think I procrastinated making this for so long because I was deathly afraid of messing them up. I knew that if they didn't come out white and fluffy, I would throw a mega-tantrum that would involve tossing burnt cookies all over my kitchen and binge eating 4 boxes of Lofthouse cookies from the grocery store.

In baking these, I only had one minor issue. It took me a couple tries to get the size right. The first ones I made were gigantic. Lofthouse cakes. My cookie cutter was too big and I didn't roll the dough thin enough. So I rolled the dough out to about 1/16-inch thick and used a small drinking glass as a cookie cutter. The original recipe said 1/4-inch but that's how I turned my cookies into cakes. The dough rises a ton.

scary big lofthouse cookiecake


Once I figured out the size issue, they came out great! They were white (even on the bottom!!) and fluffy. Then I covered them in the super sweet frosting. And I mean reallyyyyyyyy covered so I wouldn't have to waste any cookie.

Then I covered them in sprinkles. Like a lot. I'm sort of like a 5 year old. Sprinkles make me smile. Especially when they are St. Patrick's Day themed!

This recipe makes about 5 dozen cookies. I froze about 2 dozen without frosting. And used all the frosting that this recipe called for on 3 dozen (yeah, I have a frosting problem. so?). I read that they freeze well but haven't tried to thaw them out yet so I'm not positive. But even if they aren't perfect, I'll just double the frosting and triple the sprinkles and life will be perfect!

So make these to prove that you're not Betty Crocker or the Pillsbury Doughboy, you're BETTER!

Soft Lofthouse Style Frosted Cookies (5-6 dozen cookies) from Two Peas and Their Pod
  • ·         For the Cookies:
    6 cups all-purpose flour
    1 teaspoon baking soda
    1 teaspoon baking powder
    ½ teaspoon salt
    1 cup unsalted butter, at room temperature
    2 cups granulated sugar
    3 large eggs
    2 teaspoons vanilla extract
    1½ cups sour cream
  • ·         For the Buttercream Frosting:
    1 cup unsalted butter, room temperature
    1 teaspoon vanilla extract
    4 cups powdered sugar
    Pinch of salt
    6 tablespoons heavy cream
  • ·         Food coloring and sprinkles, optional
1. In a large bowl whisk together the flour, baking soda, baking powder and salt; set aside.
2. In the bowl of a stand mixer, cream the butter and sugar together at medium speed until light and fluffy. Add the eggs, one at a time, beating until each is incorporated. Add the vanilla extract and sour cream and beat at low speed until combined.
3. Add the dry ingredients and beat at low speed until just combined, scraping down the bowl as needed. Dough will be a sticky. Divide dough into two sections. Flatten into rectangles about 1½ inches thick, then wrap with plastic wrap. Chill in the refrigerator for at least two hours.
4. Preheat the oven to 425 degrees F. Line large baking sheets with parchment paper; set aside.
5. Lightly flour the countertop and the top of the dough. With a rolling pin, roll the dough out to 1/16-inch thickness. Using cookie cutters, cut out the cookies and place on prepared baking sheets. Bake for 7 minutes, until cookies are slightly golden around the edges. Immediately transfer cookies to a wire rack to cool. Cool cookies completely before frosting or the frosting will melt off.
6. To make the frosting, in the bowl of a stand mixer fitted with the paddle attachment, cream together the butter and vanilla extract. Slowly beat in powdered sugar and the pinch of salt. Once smooth and creamy, add in heavy cream, 1 tablespoon at a time, then beat at medium-high speed for a minute or two until light and fluffy. Add food coloring, if desired, and beat until combined.
7. Once cookies have cooled completely, frost and add sprinkles, if desired. Allow frosting to set, then store in an air-tight container. These will last for at least a week (that's how long it took me to eat them anyway).


that's the cookie cutter that was created the gigantic cookie

look at those beautiful spring greens!

holy cookies! and zebra pants and fuzzy socks...

lofthouse mountains
Happy St. Patrick's Day!

Wednesday, February 29, 2012

Chocolate Chip Cookies

I think I have mentioned that I don't like boring food.

My sister will go to a Mexican restaurant and order a cheese quesadilla. It makes me angry. I could make her that at home for like a dollar. It's a total waste of money and ordering food, in my opinion. When I order something off a menu, I think to myself, "What can I not make for myself at home?" and then I order that. So it's generally the most complex item with crazy ingredients that I wouldn't know where to buy or how to cook. 

When I cook something, I am generally drawn to recipes that have a ton of ingredients. You probably won't ever see a recipe on here that has a name like "Simple Pasta with Olive Oil". YAAAAAAAAAAAAWN.

So when I was home last weekend, I told my mom I was going to make a dessert. She said that her boyfriend wanted to make his mom's famous chocolate chip cookies. My heart sank. Chocolate chip cookies? That's the MOST boring dessert I could possible think of. I had envisioned something with four kinds of chocolate and peanut butter and mousse and crunch and food coloring and sprinkles and ganache and anything else with a ridiculously high sugar content.  Duh.

However, because I am kind and accommodating, I agreed to make them. Reluctantly. I was prepared to be extremely underwhelmed.

Now, I don't say this often but....

....I was wrong.

These cookies were awesome. Hands down, the best chocolate chip cookies I have ever had. My mom's boyfriend, my sister, and I were eating spoonfuls of the batter as my mom stared at us in disgust.

I think the difference might be the Crisco. I have never baked with Crisco but it seemed to make the dough lighter and creamier.  I might be making that up but I'm gonna go with it.

I do credit part of the deliciousness of these cookies to the fact that, in addition to the the amount of chocolate chips that were called for in the recipe, I dumped in a whole bag of leftover Valentine's Day M&Ms (for a double batch). Whoops.  I just couldn't leave it alone.

Oh, and I made them into an ice cream sandwich.

So delicious. And pretty. And not boring.

My sis, Kennedy, enjoying my creation.

These cookies definitely changed my mind about plain (coughBORINGcough) recipes.  Maybe a couple uncharacteristically simple recipes will make it on the blog from time to time.

 Side story:  My mom's boyfriend obviously doesn't bake often.

I told him to put parchment paper on the baking sheets. About 2 minutes into baking the first batch, I noticed that the kitchen seemed to be getting a little foggy.  I opened the oven and smoke came pouring out.  I pulled out the cookies and could not figure out what was going on.

Then I saw the wax paper on the counter. He thought that wax paper and parchment paper were the same product.

They're not.

He's lucky I like him. And that my mom paid for all of the groceries. Because he ruined 24 cookies. Unacceptable.

 
the waxy cookie remnants
You should make these. On parchment paper. 

Chocolate Chip Cookies
  • 1 cup Crisco 
  • 1 cup granulated sugar 
  • ½ cup brown sugar
  • 2 eggs
  • 2 tsp. vanilla
  • 2 1/4 cup flour 
  • 1 tsp. baking soda
  • 1 tsp. salt
  • 1 cup chocolate chips
  • 1/2 bag of M&Ms
  1. Combine Crisco and sugar, cream well, blend in eggs and vanilla.  
  2.  Combine dry ingredients and then add to cream blend mixing well.   
  3. Stir in chocolate pieces.   
  4. Drop by heaping tsp. full onto cookie sheet covered with parchment paper.  Bake at 375 for 10-12 minutes.