Sunday, August 12, 2012

Corn Cakes with Tomato Avocado Relish

The girls I work with and I have decided to have a weekly dinner night! I could not be more excited! It means I get to cook, be social, and have a chance to relax during the week. It's absolutely perfect. The wine doesn't hurt either :)

the table setting. aren't my NEW plates on my NEW table super cute and classy?!?!


I hosted prepared the first dinner. Since it's just the girls, I figured I would make a light and girly recipe. Ya know, the ones that if you cooked them for your dad or boyfriend (not that I have that issue, thank God) they would be like... "uuhhh so... that was an okay appetizer but where's my meat and potatoes?".

I chose these corn cakes because corn is on super sale right now and it's ridiculously sweet and delicious. I think these were perfect for a dinner salad because they were hearty enough to fill you up without weighing you down. We used the relish and a sriracha as dressing. I loved how the sweet corn and the creamy avocado contrasted with the bite of the red onion and spicy sriracha.

The original recipe called for frying them in oil. I'm not huge on frying things, especially if I can figure out how to bake the item or cook it in a healthier way. But I tried to fry them and it just didn't work well. My stove is a little lopsided and heats unevenly. I ended up burning the first batch, melting my spatula, and smoking up my apartment. Plus, Arizona is just too darn hot to be frying things in your house. So I quickly washed out my frying pan, sprayed it with cooking spray, and "fried" the rest of the cakes that way. They came out much better and healthier! I love when mistakes work out for the better :) Unlike my chocolate pie from yesterday's post...

Also, the patties freeze well so cook up a bunch and toss them in the freezer. Then you can just pull them out, reheat them, and toss them over some spinach for a quick and tasty salad!


Corn Cakes with Avocado and Tomato Relish (12 cakes)
For the corn cakes:
  • 3 large ears of corn, shucked
  • 1 cup all-purpose flour
  • ½ cup cornmeal
  • ¼ cup red onion, finely diced
  • ¼ cup thinly sliced fresh basil
  • 1 tsp. baking powder
  • ½ tsp. baking soda
  • Coarse salt and freshly ground pepper
  • 2 large eggs, lightly beaten
  • 2 tbsp. half and half (I used fat free)
  • 2 tbsp. unsalted butter, melted
  • cooking spray, for frying
For the relish:
  • 2 medium tomatoes, cored and chopped
  • ¼ cup of red onion
  • 1 tbsp. minced fresh basil
  • 1 clove garlic, minced
  • Juice of half a lime
  • 1½ tsp. olive oil
  • 1½ tsp. white wine vinegar
  • Coarse salt and freshly ground pepper
  • 1 ripe avocado, pitted and diced

  • Sriracha, for serving (optional)
  •  Spinach, for serving

1.  Cut the corn kernels off of the cobs and place in a large bowl.  Place 2 cups of the corn kernels in the food processor and pulse several times, until the corn is slightly pureed but still chunky.  Scrape the mixture into the bowl with the remaining corn kernels.  Add the flour, cornmeal, onion, basil, baking powder, and baking soda to the bowl.  Season with salt and pepper to taste.  Stir to mix well.  Add the eggs, half and half, and butter, and stir just to combine.
2.  To make the salsa, combine all of the ingredients except the avocado in a medium bowl and mix well to combine.  Cover and refrigerate until ready to serve, up to 2 days.  Just before serving, mix in the avocado.
3.  Place a large skillet over medium heat.  Spray the pan with cooking spray. Scoop the batter into the skillet a heaping tablespoon at a time, cooking the cakes in batches of 4 or 5 so that they are not touching.  Cook 1-2 minutes per side, until golden brown. Transfer the cooked cakes to a plate and repeat with the remaining batter.
4.  Serve immediately topped with the relish and drizzled with sriracha, if desired.


the relish

batter


sizzling corn cakes
corn cake salad :)


Saturday, August 11, 2012

Creamy Ladyfinger Cake with Raspberry Sauce

Ok, so this is the FINAL piece of my grandmother's birthday dinner.

She gave me this recipe and asked if I would try it out. I had never used lady fingers before so I was a little nervous. But she said that it tasted just how she remembered and everyone loved it!

It was basically like a very light version of cheesecake! The lady fingers make for a very light and fluffy crust and the filling isn't nearly as dense as cheesecake but is still fairly rich from the cream cheese and heavy cream. Because it's lighter, you can eat a big slice without feeling sick, which I love :)

This recipe looks very elegant but comes together very quickly because the lady fingers are premade, the filling whips up quickly, and the "sauce" is ready as soon as the carton of frozen raspberries in juice thaws. Hey, that's what the recipe called for! So for once it wasn't me being a lazy bum. Surprising, right?

The leftovers also hold up very well. I thought that the ladyfingers might get soggy but I ate it for 3 days after and it was delicious every time!  Just keep the sauce in a separate dish and add it right before you eat it.

On a side note, I'm very glad that this dessert worked out so well because the other dessert was a total flop. At almost every single holiday, my family makes a chocolate pie. It's just a pie or graham cracker crust filled with chocolate pudding.

Now, given how often I have: 1) seen this pie made, 2) eaten this pie, and 2) made recipes far more complex than this simple pie... you would think that I would be able to make this with my eyes closed.  NOPE. It came out like soup. Why? Because I cannot seem to read directions all the way through. I read the first part of the directions and followed them for pudding. If I would have continued to read, I would have noticed that the recipe said to use less milk if using the pudding for a pie.  I've learned my lesson because the pie came out looking like this.

mushy pie
yeah, it looks like poop.


Everyone laughed at me. Ms. Expert-Chef-In-Training can't even make an instant pudding pie. Awesome. At least I'm not too ashamed acknowledge my epic failures.

I just think that my culinary skills did not want to be stifled but something so boring and simple so my brain just rejected the pie so that people would focus their attention the other creamy, tart, homemade, beautiful dessert. That's my excuse and I'm sticking to it.

Creamy Ladyfinger Cake with Raspberry Sauce (8 servings)

  • 2 packages of lady fingers
  • 1 8 oz cream cheese (I used fat free)
  • 1 3 oz cream cheese
  • 1 cup granulated sugar
  • 1 tsp vanilla
  • 1 pint heavy cream 
  • 2 10 oz containers of frozen raspberries in juice
  1. Line the bottom of a 9-inch springform pan with lady fingers. Line the sides of the springform pan with ladyfingers (going up and down, the outside facing the pan so that they will show when the pan is removed). 
  2. Beat together the 2 packages of cream cheese, sugar, and vanilla until smooth. Set aside.
  3. Beat the heavy cream until stiff peaks form. Gently mix the whipped cream into the cream cheese mixture until completely combined. Do not over-mix.
  4. Put half of the mixture into the springform pan. Smooth it over with a spatula. Place another layer of ladyfingers on top of the cream cheese mixture. Layer the other half of the cream cheese mixture on top of the lady fingers. 
  5. Chill the cake overnight. Serve with thawed raspberries in juice. We chose to add the raspberry sauce to each individual slice so that the cake wouldn't get soggy. 

um, I probably could have made this look a little nicer...

the base

beginnings of layer two
ready to chill overnight
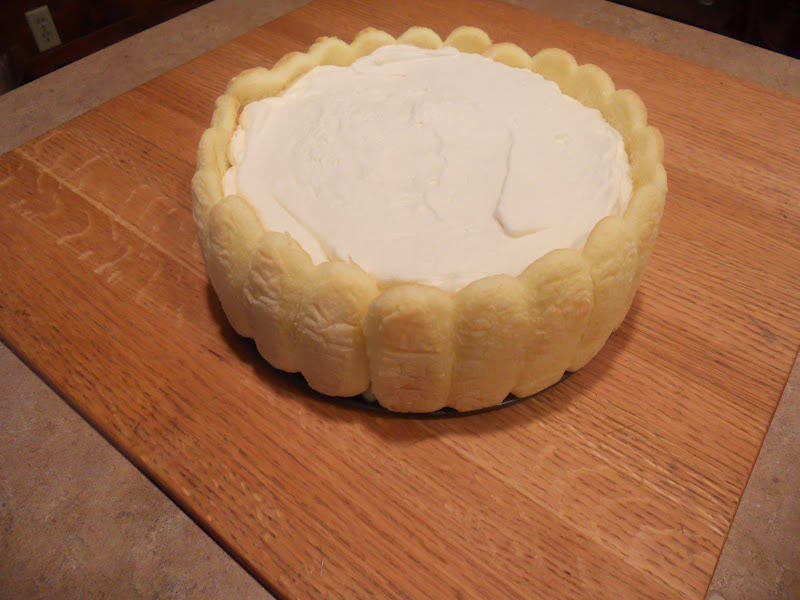
so pretty!
with raspberries :)


Sunday, August 5, 2012

Baked Shrimp Scampi

Hi! I've been totally MIA but with good reason...

I moved to Tucson, Arizona! I had a job interview on Monday July 16th, got offered the job by the end of the interview, left to drive across the country on the 20th, and started work as an ESL teacher on the 25th. How crazy is that?!?!

So far, I love it here. It's a large city but it feels pretty small because all of the sections are sort of quartered off. I have everything that I need within a 15 minute drive. The weather is great. I love the heat and the monsoon season. I love that I live in the Catalina Foothills because I wake up to a gorgeous mountain view every morning. There are so many outdoor activities and cool restaurants to explore. I was really nervous about the move but I'm really glad that I did it! I'm definitely ready for an adventure :)

Back to the food!  This is the final recipe from the dinner that I made for my grandmother's birthday.

This baked shrimp scampi was awesome. It was really easy to put together and even easier to cook because you just pop it in the oven!  It was rich and garlicy without giving you the killer heart burn that buttery Italian food can often cause. I served it with Roasted Garlic Parmesan Broccoli and Roasted Rosemary Red Potatoes. As I mentioned before, it was a stellar meal made with love for an even more stellar grandmother!

the birthday dinner spread
full plate!
the fabulous four Cocozzo women :)

Baked Shrimp Scampi (6 servings)


2 pounds (12 to 15 per pound) shrimp in the shell
3 tablespoons good olive oil
2 tablespoons dry white wine
Kosher salt and freshly ground black pepper
12 tablespoons (1 1/2 sticks) unsalted butter, at room temperature
4 teaspoons minced garlic (4 cloves)
1/4 cup minced onion
3 tablespoons minced fresh parsley leaves
1 teaspoon minced fresh rosemary leaves
1/4 teaspoon crushed red pepper flakes
1 teaspoon grated lemon zest
2 tablespoons freshly squeezed lemon juice
1 extra-large egg yolk (can leave out)
2/3 cup bread crumbs
Lemon wedges, for serving

1.  Preheat the oven to 425 degrees F.
2.  Peel, devein, and butterfly the shrimp. You can leave the tails on for a prettier presentation or remove them for easier eating. Place the shrimp in a mixing bowl and toss gently with the olive oil, wine, 2 teaspoons salt, and 1 teaspoon pepper. Allow to sit at room temperature while you make the butter and garlic mixture.
3.  In a small bowl, mash the softened butter with the garlic, shallots, parsley, rosemary, red pepper flakes, lemon zest, lemon juice, egg yolk, panko, 1/2 teaspoon salt, and 1/4 teaspoon of pepper until combined.
4.  Starting from the outer edge of a baking dish, arrange the shrimp in a single layer cut side down with the tails curling up and towards the center of the dish. Pour the remaining marinade over the shrimp. Spread the butter mixture evenly over the shrimp. Bake for 10 to 12 minutes until hot and bubbly. If you like the top browned, place under a broiler for 1 -3  minutes, until browned. Serve with lemon wedges.

butterflying the shrimp
butterflied!
arranged shrimp
pre-baked.
finished!


Saturday, July 14, 2012

Roasted Garlic Parmesan Broccoli

Sounds simple, right?

Well, it is.

But it also has a pretty impressive presentation and a great taste. Since my grandmother's birthday, she has called me four times to tell me how great it was and ask me questions about how I prepared it.  Usually side dishes get overlooked or overshadowed by the main dish. The main dishes for her dinner were marinated steak tips (to DIE for, I swear they melt in your mouth) and baked shrimp scampi (recipe to coming soon!). So the fact that the broccoli made such an impression on people really says something.

As I mentioned in my last post, I'm currently obsessed with roasting vegetables. I grew up with steamed frozen vegetables. When I'm running low on time or energy, frozen veggies are still my go to side dish. But if I have any fresh vegetables and a little time before dinner, I just cannot resist roasting them. Is it just me or does roasting give everything a wonderful nutty flavor? I might be making that up but I love it.

The addition of parmesan cheese and breadcrumbs makes the roasted broccoli look a little fancier and taste richer. The preparation is just as easy as simply roasting the broccoli with olive oil but the additions make it seem more appropriate for a special occasion.

Try this for a semi-elegant twist on roasted broccoli!

Roasted Garlic Parmesan Broccoli (4 servings)
  • 1 lb fresh broccoli, broke up into large florets
  • 2 Tbsp olive oil
  • 2 cloves garlic, minced
  • 1/2 tsp pepper
  • 1/4 tsp salt
  • 1/3 cup seasoned bread crumbs
  • 1/4 cup parmesan
  • 2 Tbsp butter, cut into small pieces
  1. Preheat the oven to 400 degrees.
  2. Place the breadcrumbs in a 9x13 pan for 2 minutes. Transfer into a bowl and set aside. 
  3. Toss the broccoli with olive oil, garlic, salt, and pepper. Mix in breadcrumbs and parmesan cheese.
  4. Transfer to the 9x13 pan. Sprinkle pieces of butter evenly over the top of the broccoli. Roast for about 15 minutes or until the broccoli reaches the desired tenderness.


viola!

Wednesday, July 11, 2012

Roasted Rosemary Red Potoates

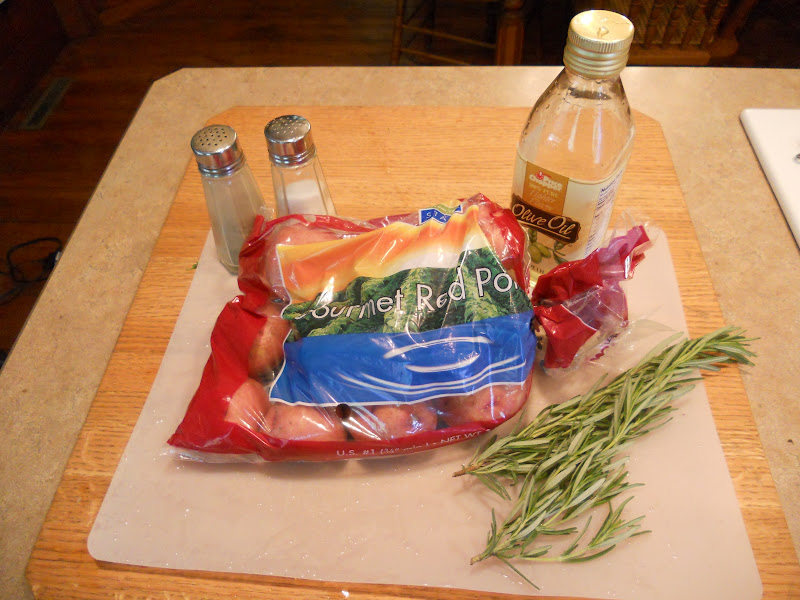
I love roasting vegetables for so many reasons. It's so easy. Basically you just have to chop your favorite veggies, toss them in olive oil and some seasoning, and put them in the oven at around 400-450 until they are cooked to your desired tenderness. Easy peasy!

I also love that it really brings out the natural flavors of the vegetables and the herbs that you choose to use. The vegetables aren't smothered in a rich sauce that overpowers them. Now don't get me wrong... I'm a HUGE fan of thick, creamy, cheesy sauces but we're trying to keep it light for summer, remember? Rosemary has a wonderful aroma. I got mine straight from my grandfather's garden, which makes it even better because it's completely fresh. And free :)

Roasted. Rosemary. Red potatoes. I love alliteration almost as much as I love roasting ridiculously remarkable raw red potatoes.

Ok, I'm done.

This recipe is so simple. The combination of fresh rosemary and potatoes is a classic combination for a side dish to accompany meat main dishes. The leftovers would be reheated in a skillet to make home fries and covered with drippy eggs.

I'll be sharing the other two dishes that I made with these potatoes for my grandmother's birthday later in the week so stay tuned!

Roasted Rosemary Red Potatoes (8 servings) 
  • 3 lbs red potatoes, cut into 1/2 inch pieces
  • 2 Tbsp olive oil
  • 2 Tbsp rosemary, minced
  • 1 tsp salt
  • 1 tsp pepper
  1. Preheat the oven to 400 degrees. Spray a 9x13 pan with cooking spray.
  2. Toss the red potatoes with the olive oil, rosemary, salt, and pepper. 
  3. Place the potatoes the prepared pan in a single layer to ensure even roasting. Roast for 30-40 minutes (I did around 40 because I had other items in the oven and we like our potatoes a little browned on the outside.)


Monday, July 9, 2012

Patriotic Trifle

I was looking through my camera and I realized that I forgot to post my 4th of July recipe! Food blogger fail. Especially for me because I get really excited about making themed food. And parties. And outfits. I blame my love for all things themed on my four years of sorority life <3

I made this patriotic trifle to bring to a family friend's barbeque. I had to whip something up really quickly because I was soaking up the sun all day and did not feel like being cooped up in the kitchen. I threw together this trifle in about 30 minutes so it was perfect!

This dessert is easily adaptable. I used angel food cake, strawberry puree, vanilla pudding, and blueberries and strawberries for the layers. You can use any flavor of cake, fruit puree/alcohol (to moisten the cake), pudding, and fruit/candy topping that you'd like. The possibilities are endless! My mom makes a boozy version with chocolate cake, Bailey's, chocolate pudding, and Heath Bar pieces. Everyone goes absolutely crazy for it. The important thing to remember is the order of the layers:

  1. Cake
  2. Fruit puree/alcohol
  3. Pudding
  4. Cool whip
  5. Toppings (fruit/candy)
  6. Repeat!
I cannot wait to experiment with more flavor combinations!  I will definitely be making plenty of other versions because: it's so easy to put together; it tastes great; and it's very pretty if the layers are carefully assembled. This is perfect for a party because it's cheap and makes a ton of servings!

So happy belated 4th of July! I'm within a week so it's still acceptable to celebrate, right?

Patriotic Trifle
  • 2 angel food cakes
  • 2 boxes instant vanilla pudding (I used sugar free)
  • 1 quart whole milk
  • 1 large container Cool Whip (I used fat free)
  • 1 Tbsp granulated sugar
  • 2 Tbsp water
  • 2 16 oz containers strawberries, sliced
  • 2 pints blueberries
  • 1 banana, sliced
  1. Prepare the instant pudding according to the directions on the back of the package (I used 1 quart of whole milk for two packages of pudding mix). Chill in the refrigerator for about a half hour.
  2. Puree 1 cup of strawberries with the sugar and water. Set aside.
  3. Tear up one angel food cake into bite-sized pieces. Place in an even layer at the bottom of a large, clear serving bowl.
  4. Pour half of the strawberry puree over the cake layer. 
  5. Spread half of the pudding evenly over the cake. Make sure the pudding goes all the way to the sides of bowl so the separation of layers can be seen from the outside of the bowl.
  6. Spread half of the Cool Whip over the pudding layer in the same manner.
  7. Reserve enough strawberries and blueberries for the flag decoration. Combine the rest of the blueberries and strawberries. Make an even layer of fruit. 
  8. Repeat steps 3 through 6.
  9. Create an American flag out of the remaining fruit, as shown in the pictures below.


look at those layers!
Happy 4th of July, America!
yeah, that's a themed dessert and a matching outfit :)
diggin' in!

Sunday, July 1, 2012

Crab-Stuffed Baked Cod

Happy July 1st! July is my favorite month. I generally don't have work or school. I get to lay in the sun all day. And it's my birthday month. Yay!

Anyway... onto the food! I really want to try to eat more fish. I think I have always just assumed that I don't like fish because I don't like plain baked salmon. It's just too fishy and it's ugly and it smells weird. Not for me. So I never bother trying, ordering out, or cooking any other kind of fish. Well, that's silly so I'm making a change.

I decided to try crab-stuffed cod because it's something that I always contemplate ordering when I'm out to eat but then I chicken out. I'm glad that I finally tried it because it was great! The cod was thick and flaky. I think the sauce was a perfect combination of olive oil, butter, lemon juice, and parsley because you can really taste each ingredient. The stuffing made the fish more filling and was really tasty. The only change I might make is to decrease the bread crumbs and to use fresh crab rather than canned for a more crab-y and less carb-y stuffing.

This recipe definitely changed my mind about fish and I CANNOT wait to try more. So be on the lookout for more seafood recipes on the blog. And in the meantime, give this a try :)


Crab-Stuffed Baked Cod (4 servings)
  • 1 ½ lbs cod
Sauce
  • ¼ cup Chicken Broth
  • 2 Tbsp lemon juice
  • 1 ½ Tbsp Butter, melted
  • 1 Tbsp olive oil
  • 1 tsp parsley
  • salt and pepper
Crab Meat Stuffing
  • 4 oz Crabmeat (I used canned)
  • 3/4 cups Italian style bread crumbs
  • 2 Tbsp Parmesan cheese
  • 1 ½  Tbsp butter, melted
  • 1 Tbsp parsley
  • 1 egg, beaten
  • 1 Tbsp Olive Oil
  • salt, pepper and paprika to taste
Topping
  • bread crumbs
  • parsley
1.       Preheat oven to 375 degrees.
2.       Combine all the sauce ingredients and pour into an 8x8 baking dish sprayed with non-stick spray.
3.       Make a cut into the fillet length-wise, almost all the way through (almost as if butterflying it). Peel back the top layer of the fish and put stuffing on the bottom layer of the fish. Put the top layer of the fish back over the stuffing (see the picture below, if this is confusing).
4.       Place stuffed filets in the baking dish. Drizzle olive oil on the filets. Sprinkle with bread crumbs. Bake for 30 minutes or until bread crumbs are browned and fish is flaky. Garnish with parsley.


the sauce
the stuffing
stuffing the fish!
ready to be baked
all baked!