Friday, March 30, 2012

Reuben Sandwich

Today will be the last post of my St. Patrick's Day themed March :(

I'm a little sad. Luckily, I still have a bunch of leftover goodies in my freezer so I can pull them out when I'm going through withdrawal in a couple days.

And I still have a gigantic container of shamrock sprinkles! Springtime shamrock shakes? You better believe it!

Today's recipe is a good old fashioned Reuben! I love all sandwiches because of how creative they allow you to be with mixing and matching ingredients. And the Reuben is one of my absolute favorite combinations. The unique taste and texture of the corned beef, the strong flavor of the sauerkraut, and the tangy Russian dressing. Perfection!

For my personal twist on the sandwich, I used whole wheat sandwich thins. It just happened to be the bread I had on hand and I don't love rye enough to buy and use a whole loaf. I actually liked the sandwich thins. As I've stated before, I think that bread has a tendency to swallow up the flavors of a sandwich and I wanted to taste every delicious bite of this sandwich without the bread mellowing it out at all. Plus, it makes the sandwich quite a bit more diet friendly. I also substituted muenster cheese for swiss. I'm not the biggest fan of swiss cheese and I don't think it melts well. To me, muenster tastes like a cross between swiss and provolone so it seemed like the ideal substitution.

The highlight of this sandwich is the Russian dressing. I used a recipe I found that was based off of the Zingerman's recipe. The only changes I made were that I omitted the lemon juice because I didn't have any, I substituted soy sauce for Worcestershire sauce because I hate that stuff with a passion, and I increased the horseradish from 1/2 teaspoon to a full tablespoon for a liiiiiittle extra bite. This dressing is creamy and chunky and completely delicious. I'll never ever buy it from the store again. Period.

Just whip up this recipe next time you're craving a nice warm delicatessen-quality sandwich!

Reuben Sandwich (1 sandwich)

For the Russian dressing from Food Network
  • 3/4 cups mayonnaise
  • 1/2 cup chili sauce
  • 2 tablespoons sour cream
  • 2 teaspoons chopped curly parsley leaves
  • 2 tablespoon onion, minced
  • 2 tablespoon sweet pickle, minced
  • 1 tablespoon grated horseradish
  • 1/4 teaspoon soy sauce
  1. Combine the mayonnaise, chili sauce, sour cream, parsley, onion, pickle, horseradish and soy sauce in a bowl and mix well.
  2. This makes about two cups. Store in an airtight contain in the refrigerator for up to two weeks. 
For the Reuben
  •  1 tablespoon butter
  • 2 slices of your favorite bread (rye if you want to be tradition, sandwich thins if you want to be carb conscious)
  • 2 slices muenster cheese (swiss, if you prefer the original)
  • 1/4 cup sauerkraut
  • 2 ounces shredded or sliced corned beef, warmed
  • 1-2 tablespoons Russian dressing
  1. Heat a skillet over medium heat. 
  2. Butter the outsides of your bread. Place one slice of bread butter-side down in the skillet. Put one slice of cheese on the bread. Layer with half of the sauerkraut and half of the Russian dressing. Then put on all of the corned beef. Finally, layer with the rest of the Russian dressing, the rest of the sauerkraut, and the other slice of cheese. Place the other slice of bread butter-side up on top of the sandwich. 
  3. Grill for about 3 minutes on each side, or until the cheese is melted and the outside of the bread is golden-brown.
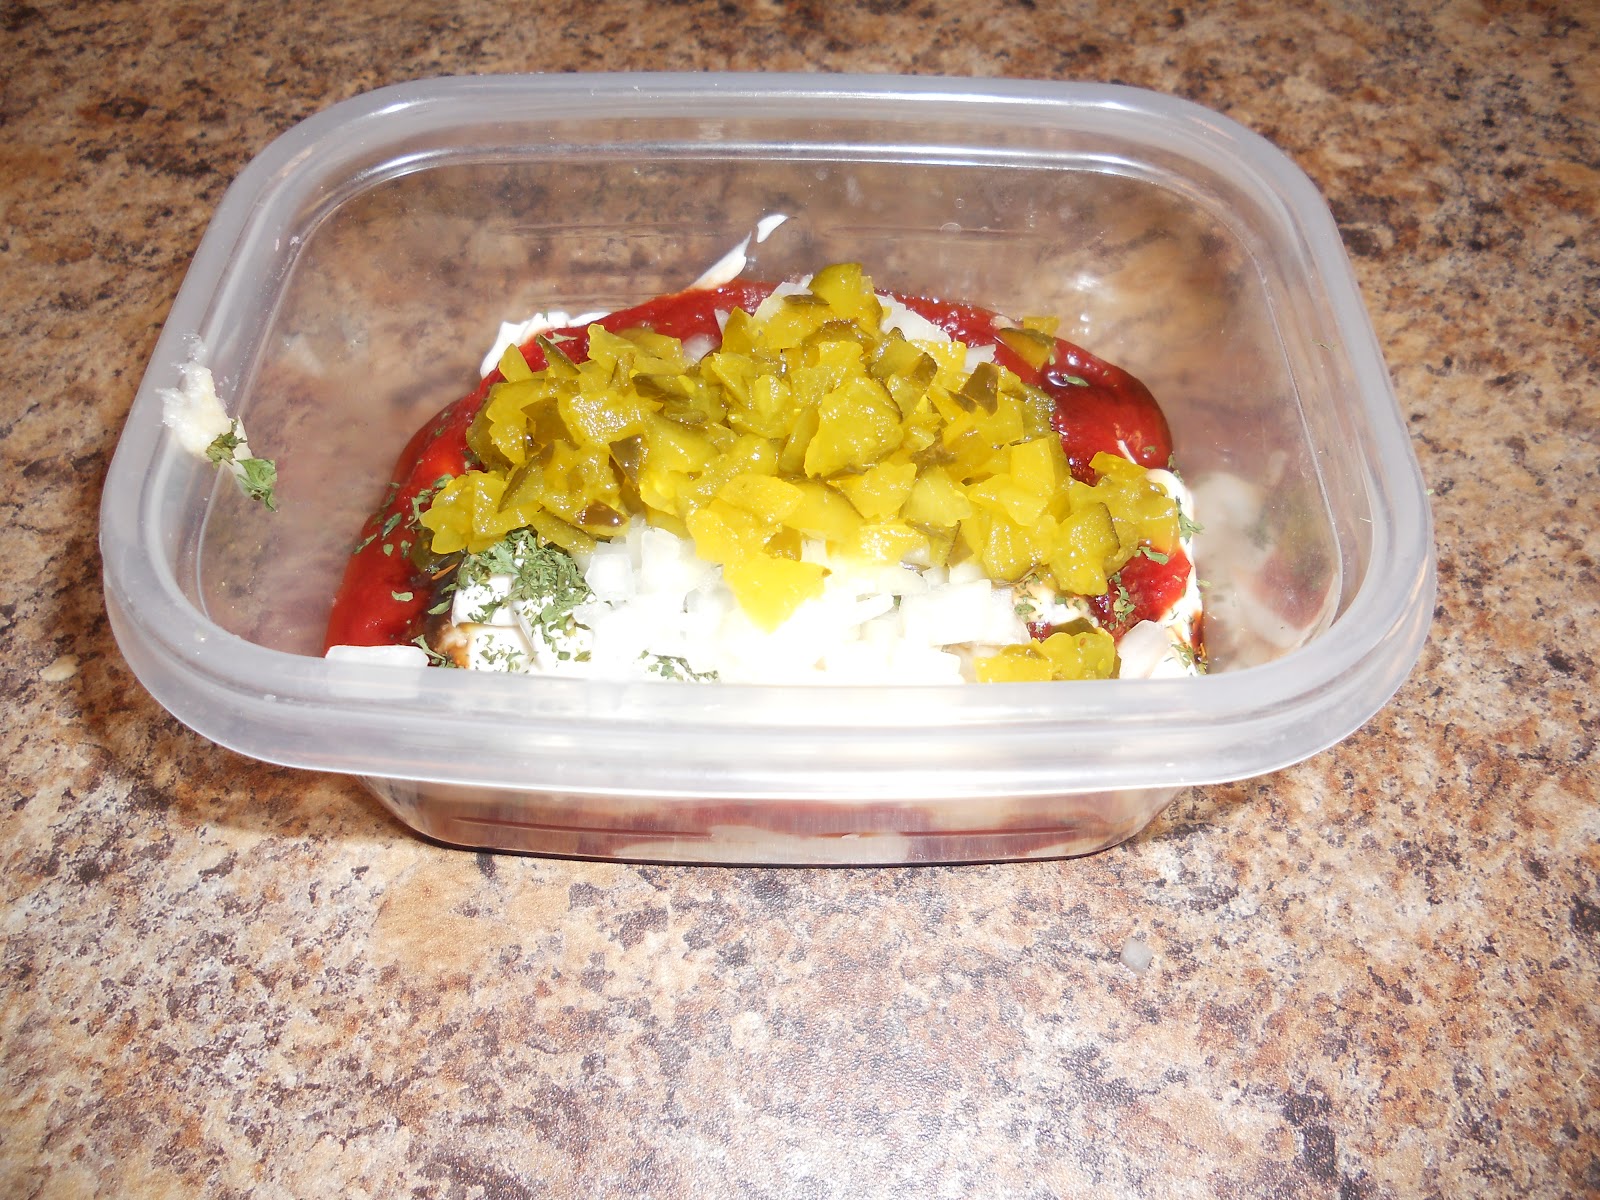
Russian ingredients

homemade Russian dressing!


looks deli-worthy to me!

Wednesday, March 28, 2012

Soda Cupcakes with Vanilla Buttercream Frosting

I can already tell that this is going to be my "go to" cupcake recipe. It's a very simple recipe in terms of baking and flavor. It is perfect for occasions when you want the decorative value of the cupcakes to be the focus.

The cake requires only two ingredients: one box of cake mix and one can of soda. Three, if you want to use food coloring. Don't ask me how it works, but it does. And it yields an extremely delicious and moist cake with less work and calories. Who would have thought that you could further simplify a boxed cake mix?!?! I love it! The only thing to keep in mind is that the cake box says it will make 24 cupcakes but this soda method only yields 12.

For the two sets of cupcakes that I have made so far, I chose to use white cake and a diet lemon-lime soda. I definitely plan to experiment with other soda/cake combinations. White cake with grape soda or raspberry soda. Vanilla cake with root beer, coke, or orange soda. Chocolate cake with cream soda. Strawberry cake with pineapple or cream soda.  

The frosting is homemade. I tried several different recipes for a vanilla buttercream and I finally decided that this one was a keeper based on my own palate and the feedback from others. Every time I make cupcakes with this frosting, people tell me that it's absolutely delicious and ask me for the recipe. I think it's the perfect texture (sort of light and fluffy but thick enough to hold up when piped on to a cupcake) and a wonderful balance of flavors (it's very sugary but you can still taste the butter and vanilla).

As for the decorations, my sister had been talking about these rainbow cupcakes for weeks so I decided to make them for her birthday. I also think they were very fitting for St. Patrick's Day. Rainbows and pots of gold and leprechauns, ya know. Plus I put shamrock sprinkles on them, which makes any baked good festive! I included the technique for making the layers in the recipe. It's pretty tedious but the result is totally worth it.

Ken being a spoiled birthday girl :)
The second cupcakes I made were for The Hunger Games movie. I dyed half of the batter orange and half red and then swirled them. Then I dyed the frosting orange and topped with some red sugar sprinkles. I was channeling both Peeta, the baker, and Katniss, the girl on fire.

You should make these and go CrAzY decorating :)

Rainbow Soda Cupcakes (12 cupcakes) adapted from Budget Bytes and Baked Bree
For the cupcakes
·         White cupcake liners
·         1 box of white cake mix
·         12 oz can of diet lemon-lime soda
·         Food color
For the frosting
  • 3 cups of confectioner’s sugar
  • 1 cup (2 sticks) of butter
  • 1 tablespoon of vanilla extract
  • 1-2 tablespoons of whipping cream/half and half/milk
Garnish
  • Sprinkles
1.       Preheat your oven according to the directions on the cake mix box. In a large bowl, mix the contents of the box of cake mix and 12 oz. of soda.
2.       Divide the cake mix as equally as possible into 6 small bowls.
3.       Dye each bowl of batter a different color of the rainbow.
  •  To make purple: 9 red and 6 blue drops
  • To make blue: 12 drops
  • To make green: 12 drops
  • To make yellow: 12 drops
  • To make orange: 12 yellow and 4 red drops
  • To make red: 18 drops
4.       Starting with the purple, put about ½ to ¾ of a tablespoon at the bottom of each cupcake liner. Use your finger to completely spread the batter over the bottom of the cupcake liner. Continue with the rest of the colors in rainbow order. Make sure to spread each layer all the way to the sides of the cupcake liner and push the batter into the liner without mixing layers. This is relatively tedious but it will ensure that you will see all of the colored layers when looking at the cupcakes.
5.       Bake according to the directions on the box.
6.       For the frosting: In a standing mixer or in a bowl with a hand mixer, cream the butter. Mix in the powdered sugar ½ cup at a time. Mix on medium speed until well blended. Add vanilla and cream and continue to beat on medium speed for 1 minute more, adding more cream if needed for spreading consistency.
7.       When the cupcakes are completely cooled, pipe or spread on the frosting.

all of the ingredients. can you believe it?!?


gorgeous


look at those layers!!!
these would be the treat at the end of my Irish rainbow :)
magical remnants of a rainbow cupcake that has been devoured!

fire cupcake batter


girl on fire cupcakes and mockingjays :)

Monday, March 26, 2012

Honey Mustard Glazed Corned Beef and Cabbage

I love corned beef and cabbage. I look forward to it all year long.

That's all going to change now that I know how to make it. It is no longer reserved for only St. Patrick's Day.

I load mine up with horseradish and vinegar. Like a borderline gross amount. And I wonder why I haven't been on any dates lately. Probably because I smell like boiled cabbage and vinegar. At least my taste buds have companionship :)

In order to make this recipe slightly more diet friendly, I substituted parsnips for potatoes and doubled the carrots.

My favorite part of this recipe is the glaze. I think it gives the corned beef a really great flavor. And putting the meat in the oven for about 20 minutes makes it a little crispy on the edges while still preserving the tenderness.

In general, I was surprised by how quickly and easily this came together. The only thing that will stop me from making this once every couple months is the price of corned beef. Out of season (St. Patrick's Day season, that is), it's straight up ridiculous!

Honey Mustard Glazed Corned Beef and Cabbage (6 servings) adapted from Closet Cooking
For the corned beef
·         3-4 pound corned beef brisket
·         3 tablespoons of Dijon or spicy brown mustard
·         1 tablespoon of honey
·         2 tablespoons of brown sugar
For the vegetables
·         1 head of cabbage, cut into 6 wedges
·         1 bag of carrots, sliced
·         1 bag of parsnips, sliced
·         1 onion, sliced
1.       Place the corned beef along with the spices into a large pot and cover completely with water.
2.       Bring to a boil, reduce the heat and simmer, covered, until fork tender (about 1 hour per pound).
3.       Remove the beef from the water, keeping the water in the pot. Scrape the fat off of the top and sides of the corned beef (it should fall right off if you scrape the meat with the back side of a butter knife). Pat the meat dry.
4.       Mix the honey and the mustard in a small bowl. Spread evenly over the beef.
5.       Sprinkle the beef with the brown sugar.
6.       Bake in the oven at 400 degrees for 20-30 minutes.
7.       While the corned beef is in the oven, put the carrots, parsnips, and onions in the pot with the water that the corned beef was cooked in. Simmer for about 20 minutes. Add the cabbage and simmer for another 15-20 minutes.
8.       Slice the beef against the grain and serve with the vegetables. 


look at that gorgeous slab corned beef!


I'm going to be eating corned beef and cabbage for dayyyys.

Saturday, March 24, 2012

Cake Balls

These are my new favorite dessert for entertaining because:

  1. They are bite-sized. 
  2. They are easy to make.
  3. They are easy to make in obscenely large quantities. 
  4. They are super cute. 
  5. You can mix and match about a million flavor/color combinations. 
  6. They last in an airtight container in the refrigerator for up to two weeks. 
  7. They freeze well.
  8. You can make ball jokes the entire time you are handling and eating them. Heh heh...
What else could you possibly ask for?

Oh... you're asking for St. Patrick's Day themed cake balls?

YOU GOT IT!

But also make these for every holiday or get together that you ever have. Ever. I promise that they'll be a total hit!

Cake Balls (makes 40-50 balls)
  • Box of cake mix + ingredients for baking (I used white cake with green food coloring)
  • 1 – 1 ½ cans of frosting (I used vanilla)
  • 1 ½ bags of candy melts (I used white)
  • About 3 Tbsp Crisco
1.       Bake the cake in a 9 x 13 pan according to the directions on the box.
2.       Allow the cake to cool completely (it can be a tiny bit warm to help the frosting melt). Crumble into a bowl.
3.       Mix in the frosting until you have an even mixture.
4.       Form the mixture into small balls (about 1 ½ tablespoons) and place them on a baking sheet lined with wax paper.  Put in the freezer for about a half hour or until firm.
5.       While the balls are in the freezer, melt the candy melts in a double boiler or fondue pot. Add Crisco in order to thin the mixture.
6.       Take the cake balls out of the freezer.  Poke each ball with a toothpick and dip into the candy melts.  You may need to use a small spatula to cover the top. Place the candy-coated ball back onto the wax paper. Apply sprinkles (if desired) immediately so they stick. Continue this process with the rest of the balls.
7.       Let the candy coating cool completely. Package in an airtight container. These will keep in the refrigerator for up to two weeks!


rolling some balls


dipping some balls

look at these perfect balls!

Tuesday, March 20, 2012

Andes Cupcakes

 Another green-ish dessert for St. Patrick's Day!  I'm thinking of starting an official petition to make St. Patrick's Day a "holiday season" like Christmas. This could be huge.

Andes mints make me think of my great-grandfather. He always had them on his coffee table in his living room. I spent countless days munching on Andes, eating corn chowder, and sipping ginger beer on his front porch.

So these cupcakes are dedicated to him.  Love you and miss you Curt :)

In general, I'm not a huge fan of mint in my desserts. It belongs in toothpaste and gum. It does not belong in my desserts messing with my chocolate. I think that's because the mint in candy, like York Patties or Junior Mints, is just way too strong. Andes is the only candy that I think got it right. Also, it's the one that's green rather than white. Green mint desserts are the only ones that are acceptable. Period.


However, I realize that I'm in the minority here. My whole family loves mint flavored desserts. Especially mint chocolate chip ice cream (the green kind... obviously). Because it's such a popular flavor combination, I knew that I needed to be able to make some minty recipes for them. And I wanted to provide something delicious for any mint-lovers who read my blog :)

The mint in this recipe isn't too overpowering because it is in the frosting and ganache but not in the cake.  The cream cheese and butter in the frosting really mutes the mint flavor so it is refreshing but not overpowering.

If you like mint, you'll probably love these. Plus, look how pretty they are! If you want more of a green color, put green food coloring in the frosting. I just really wanted to use a lot of green sprinkles!

Andes Cupcakes (24 cupcakes) adapted from Mel's Kitchen Cafe
Cupcakes: 
  • 2 cups sugar
  • 1-3/4 cups all-purpose flour
  • 3/4 cup HERSHEY’S Cocoa
  • 1-1/2 teaspoons baking powder
  • 1-1/2 teaspoons baking soda
  • 1 teaspoon salt
  • 2 eggs
  • 1 cup milk
  • 1/2 cup vegetable oil
  • 2 teaspoons vanilla extract
  • 1 cup boiling water
Chocolate Mint Filling:
  • 1/2 cup chocolate chips
  • 3 tablespoons heavy cream
  • 1/2 teaspoon peppermint extract
  • 1/3 cup powdered sugar
Mint Buttercream:
  • 1 cup (2 sticks, 16 tablespoons) butter, softened to room temperature
  • 8 ounces cream cheese, softened to room temperature
  • 32 ounces powdered sugar (about 7 cups)
  • 1/2 cup heavy cream
  • 1 teaspoons pure vanilla extract
  • 1 teaspoons peppermint extract
  • 24 Andes mints for garnish
1.       For the cupcakes: Preheat oven to 350°F. Line muffin cups with paper baking cups. In a large bowl, stir together sugar, flour, cocoa, baking powder, baking soda and salt. Add eggs, milk, oil and vanilla. Using a handheld electric mixer or an electric stand mixer, beat on medium speed for 2 minutes. Stir in boiling water. The batter will be VERY thin (Don't fret, it works out fine somehow). Fill the muffin cups 2/3 full and bake for 18-20 minutes. Let the cupcakes cool completely on a wire rack, after removing them from the muffin tin.
2.       For the mint filling: While the cupcakes are baking, place the chocolate chips and heavy cream in a small microwave-safe bowl and heat for 1 minute at 50% power. Stir. Repeat the process until the mixture is smooth. Stir in the peppermint extract and powdered sugar, whisking until smooth. Let the mixture cool to room temperature (but don’t let it get too stiff) and pour it into a piping bag.
3.       When the cupcakes are cool, insert the tip of the piping bag into the center of the cupcake and press gently to fill the middle of the cupcake with the mint ganache.
4.       For the frosting, in a large bowl, beat the cream cheese and butter until light and fluffy. Add the powdered sugar and mix until smooth. Add the heavy cream and peppermint and vanilla extracts. Beat until light and fluffy.
5.      Frost the cooled, filled cupcakes. Garnish with an unwrapped Andes mint. 

see how thin the batter is? strange...


baked cupcakes

ganache
filling the cupcakes with ganache

me trying to be a piping pro.
frosted!
final product :)